Thursday, March 31, 2011

Mail Box Easter Bunny


I get very excited when I can use up stuff in my stash. I have limited space in my crafting area, so when I use something, it makes room for me to buy more stuff! I bought a bunch of these mailboxes last year for Valentine's Day, and I had one left. So, I decided to transform it into a fun Easter decoration/basket.


I made the face using a variety of paper punches, Nestabilities, and my Cricut. The eyes are accented with a white gel pen, the cheeks blushed with chalk, and the freckles are made using a sharpie pen.


I wrapped a piece of designer paper around the mailbox. Ric-rack was glued around the edges. I wrapped a piece of polka dotted ribbon around the middle of the mail box. The tag was made using a stamp from Dandelion Designs. A button and some paper leaves completed the flower embellishment. I glued a pom pom on for the tail.


Then, my favorite part, I filled it with some paper shred and candy!


Supplies:
Stamps: Dandelion Designs-Happy Easter
Ink: Martha Stewart
Paper: Making Memories, Bazzill, The Paper Company
Misc: Cricut, nestabilities, pop up dots, buttons, dmc floss, black sharpie pen, white gel pen, chalk, ric-rack, ribbon, paper shred, mail box, pom pom, candy, white tacky glue


Thanks for stopping by,

Wednesday, March 30, 2011

Thinking of You Card


I just love flower stamps, and I firmly believe that you can never have too many. The Flower Fusion #1 set from Papertrey Ink is the perfect addition to any collection. At the bargain price of only $5.00, how can you go wrong?

I stamped the stem/leaf three times onto ivory cardstock. Using a sketch of one of Michelle Wooderson's cards, I added strips of coordinating designer paper. I cut flowers out with the Flower Fusion #1 die, added some decorative buttons, and popped them up. The sentiment is stamped onto the designer paper, and also popped up using pop up dots. A little sewing on the edges was added to give it a finished look.

Supplies:
Stamps: Papertrey Ink-Flower Fusion #1 and Blooming Button Bits
Paper: Bazzill, K & Company
Ink: Versafine, Memento Misc: Buttons, dmc floss, pop up dots, sewing machine, flower fusion #1 die


Thanks for stopping by,

Sunday, March 27, 2011

Tea Party Purse Favors


I made these little purses for Olivia's birthday party. She is having a tea party. The purse template is from Melzstamps. You can find the template here. They were pretty simple to make. The little teapots were stamped uisng the Papertrey Ink Tea for Two stamp set and then cut out using the coordinating die. I mounted them on a little Martha Stewart doily with a pop up dot. Then, I added little corners on the purse using a scallop circle punch and the Cuttlebug embossing folder.

Sorry the pictures are so dark.


Thanks for stopping by,

Wednesday, March 23, 2011

Edible Easter Baskets


While we can never have too many stamps, too much paper, too many nestabilities or too much money...you can have too many Easter baskets. They are such fun to fill and decorate, but what happens after Easter? They might go into storage or if you are like me, maybe I can "trick" it up for another occasion. With this project, you will be able to eat your basket!

While I was at Walmart buying my donuts, I picked up a package of Reeses eggs and Marshmallow eggs. Each basket is made with four (4) eggs. They come in packages of six, so that means you can eat two!


They are fairly simple to make. First, the base of my basket is a piece of cardboard that I cut 3 3/4 inches x 3 3/4 inches. I covered the piece of cardboard with a colored cardstock. Then, using a LOW TEMP glue stick in my glue gun, I started gluing the the crinkled ends of the egg packaging together. While the glue gun is a low temp, it is still wicked hot, so I used a pair of tweezers to to hold the ends together while it dried. After all four are glued together, it will look like a square. Then I glued the cardboard base onto the bottom of the egg square. Easy peasy! to make the handle, I just cut two strips of cardstock, adhered them together to make it little more durable, and cut a decorative edge. The handle was glued into the basket. I embellished the basket with some ribbon and the Easter stamp from Favorite Occasions by Justrite


Supplies:
Stamps: Justrite-Favorite Occassions
Ink: Memento
Paper: Bazzill
Misc: Copics, nestabilities, candy, cardboard, ribbon, low temp hot glue gun/sticks, paper shred


Thanks for stopping by,

Tuesday, March 22, 2011

Happy Easter Donut Bunny


I was at Walmart yesterday and picked up one of my favorite snacks, little packages of donuts. Those little white powdered sugar donuts are perfect for little Easter bunnies. For this quick and easy project, I used one of the Bunny Body Kits from my Etsy shop. I added a bow and a pom pom to complete this little bunny.


I was working on some tags last night, and I went to grab a piece of paper from one of the drawers, and this is what I saw:


Poor Tedy, she is just so tired! We won't mention that I have half a dozen cat beds in my apartment! But, she laid a hard plastic drawer set. Today, I put a towel down so she would be more comfortable.

Thanks for stopping by,

Friday, March 18, 2011

Vintage Style Apron Cards


I've been having issues with my crafting mojo this week. There are the remains of a dozen cards in my trash can right now. I decided that I would case one of Michelle Wooderson's cards to try and channel her talent. The card I chose is here.

I made a couple of tiny changes. The buttons are centered are paper punched circles and the sentiment is from Button Boutique. I moved the sentiment to the bottom of the card, rather than adjacent to the apron.


Supplies:
Stamps: Karen Lockhart-Vintage Apron, Papertrey Ink-Button Boutique
Paper: DCWV, Bazzill, The Paper Company
Ink: Versafine
Misc: Copics, buttons, paper punch, sewing machine


Thanks for stopping by,

Monday, March 14, 2011

Tiny Target Tissues


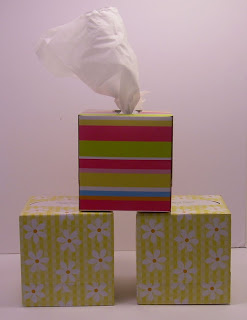
Have you seen those little boxes of tissues at the Dollar Spot at Target? They are only 3 inches by 3 inches! So, I'm thinking how cute would a little cover be for those Tiny Target Tissues?! I picked one up, actually four, and brought it/them home and got to work.


I used the same concept as the big tissue box holder that you can find on Splitcoast, just smaller. I wanted a small sentiment for the front, so I went with Papertrey Ink's Greenthumb stamp set. I embellished the little tags with some of my homemade paper roses, some leaf punches, and half pearls. On the top of the box, I cut the hole with an oval nestability. This was the only part of the project that was time consuming. I wanted the hole big enough for the tissues to come out, but the inside cardboard of the box showed, so I finally just made the hole bigger on the tissue box so the hole in the lid wouldn't show.


Question, am I the only person in the world that pulls out six tissues when I open the box and then they are all ripped? Why can't I just pull one tissue out, they all come out?

Supplies:
Stamps: Papertrey Ink-Greenthumb
Ink: Versafine Sepia
Paper: Bazzill, My Mind's Eye
Misc: Scor-pal, nestabilities, scor-tape, paper punch, paper roses, half pearls


This is a great little present to leave for a friend, co-worker, or anyone who needs their day brightened. Who does need a little tissue? Get it, a little tissue...because they are little! I crack myself up sometimes!

Thanks for stopping by,

Sunday, March 13, 2011

All That Scraps Wednesday Challenge-Buttons


This is my entry for the All That Scraps Wednesday Challenge. The requirements were to use a stamp that is sold in their store and use buttons.

For my card, I chose the Sweet November Bunny Babies Butterfly. My Bunny Baby is colored with copics and popped up with pop up dots. Using a Martha Stewart border punch, I made the center panel, and then added two strips of Bo Bunny Paper. I added a bow, the buttons and some punched butterflies using another Martha Stewart punch. Then, I added a few half pearls to the center panel and too the butterflies. Presto!, it's done!

Here is a side view:


Supplies:
Stamp-Sweet November Baby Bunnies Butterfly-Digital Stamp
Paper: Bo Bunny, Bazzill, American Crafts
Misc: Copics, half pearls, paper punch, border bunch, pop up dots, ribbon, buttons, dmc floss


Thanks for stopping by,

Thursday, March 10, 2011

Flowers from Leah Revisited

First, I'm so totally psyched about my blog header and layout. For the past year, I have spent way too much time trying to find the perfect header to best illustrate who I am. If you have been following me, you will have certainly noticed it! Nothing ever seemed to look right. A friend at work suggested that I make one myself. So, I looked into it and with the help of my two nieces, we started playing around with avatars. But, while both of them are probably the smartest teenage girls in the universe, we couldn't figure it out. So, I began my quest for a blog designer that does custom work. Well, I found the perfect person. Diana Rambles of Custom Blog Designs. She is just awesome. Diana listened to what I wanted and made me feel like I was the most important client she had. She constantly kept me informed of the process, which by the way was really quick. A lot of the blog designers have 1-2 year waiting lists or they are not accepting clients at all. The whole process starting with me contacting her and the finished product installed was less than 3 weeks! Diana did a great job and I feel like she captured who I am exactly. If you need a blog make-over, run, don't walk to her site. You won't be disappointed.

Diana made me a Beth-A-Palooza button, too! So, if you want to add my button to your blog, just grab it. I would love to be a part of your blog or other social network site. If you decide to grab it, leave me a comment, so I can come over and check it out.

Onto my card, I was going through my digital stamps the other day and decided to use Flowers from Leah image from Whimsie Doodles. Using my Scor-pal and a Martha Stewart punch, I made a fence. I printed Leah out twice. She is colored with copics, popped up with pop up dots, and then layered the flowers with more pop up dots. Then I punched out some little flowers and some leaves to embellish with the fence.


Supplies:
Stamps: Flowers from Leah-Whimsie Doodles-Digital
Paper: Bo Bunny, Bazzill
Misc: Copics, pop up dots, half pearls, paper punches


Thanks for stopping by,

Tuesday, March 8, 2011

Etsy Shop Update-Bunny Body Kits

I just listed the Bunny Body Kits for the Flower Pot Bunnies in my Etsy shop in addition to a few more mug cozy/notepad sets, bucket covers, and bitty bags.

Thanks for stopping by,

Beth

Bunny Flower Pots


I love those little flower pots they have at Target in the Dollar Spot. I had an epiphany while I was getting ready for work the other day, why not use them to make an Easter bunny? So, here is my finished product

.

I traced the wrapper that came on the flower pot onto white cardstock, cut it out and wrapped it around the flower pot. I added a small adhesive dot to the bottom of the flower pot just to hold onto the wrapper. Then, I wrapped some ribbon and tied a bow onto the top. A pom pom was added for the bunny tail. I used a variety of paper punches and my cricut to cut out the features for the face and feet. For the face, I used a white gel for the highlights on the eyes. The cheeks are blushed with chalk and the freckles were made with a black sharpie. The face and the nose are all popped up using pop up dots. For the feet, I used the ovals that I cut with my cricut and the toe pads were punched using the big hole in the crop-a-dile.

Side view of the bunny:


You can use these for non-candy Easter treats, basket fillers, and also for baby shower favors. I used Papertrey Ink-Tag Its #1 to make a quick Easter tag.


I had a lot of fun making these, so I made up a bunch of kits with all of the punched pieces all ready to be assembled. Each kit will make two sets of bunny parts. The square of pink paper is for you to punch the toe pads yourself. I though it would be easier and less messy this way. All you will need to make these little bunnies is the flower pot, a pom pom, and some ribbon. I will be listing these for sale in my Etsy shop.

This picture shows the parts to make one bunny, but the kit has enough to make two bunnies. So, there are double of everything, except, the pink square as it is large enough to cut the toe pads for two bunnies.


Make sure you check back later this evening, I will be posting the Bunny Body Kits in my Etsy shop.

Thanks for stopping by,

Beth

Sunday, March 6, 2011

Vintage Style Button Boutique


I found this great paper from Little Yellow Bicycle the last time I was at Violette's. I thought it would go perfectly with the Button Boutique set from Papertrey Ink.

The card base is made out of kraft cardstock. I sponged some Tim Holtz Antique Linen Ink on to the little doilies. The actual button cards are popped up using pop up dots to give it a little more dimension. I tea dyed some seam binding, wrapped it around the bottom of the card and tied a bow. Different buttons from my stash where added.


Here is a close up of the button card:


They came together so quickly, that I decided to make a set for gifts.


Supplies:
Stamps: Papertrey Ink-Button Boutique
Ink: Memento, Tim Holtz
Paper: Bazzill, Little Yellow Bicycle
Misc: Buttons, button card die, doilies, seam binding, pop up dots, dmc floss, clothes pin


I wanted to make a fun way to package them, so I decorated a paper bag to match. The designer paper is kind of thick, so I sewed it on to the bag. I folded the bag top and covered it another doily was sponged with the Tim Holtz Antique Linen Ink. The doily is just folded over and held together with a tea dyed clothespin. I cut/stamped another button card. I left the center blank so I could write the recipient's name on the tag. A little more seam binding and a few buttons finished off my gift.


Thanks for stopping by,

Beth

Saturday, March 5, 2011

Happy Easter Brownie Treats


This is a easy and quick project for Easter that you can have children help out with. Using a 3 x 3 envelope as a pattern, just cut out little envelopes from designer paper. I assembled them with a bit of scor-tape so they will stay together once you add the brownie. I just embellished them with a mat cut out with the Papertrey Ink Fillable Frame #5 die cut. The carnival ticket was cut out with Papertrey Ink Ticket Die, the frame is from the Just The Ticket Stamp Set, and the sentiment is from Dandelion Designs. I punched a little flower, added a rhinestone, and then tied it off with the ribbon. The brownies are from Little Debbie.


Supplies:
Stamps: Dandelion Designs-Happy Easter, Papertrey Ink-Just The Ticket
Ink: Versafine
Paper: Bo Bunny, K & Company
Misc: Ribbon, scor-tape, rhinestone, paper punch, fillable frame #5 die, ticket die, brownies


Thanks for stopping by,

Beth

Wednesday, March 2, 2011

Olivia's Cupcake Tutorial

Here is a quick tutorial for cupcake I made for little Olivia, you can find the original post here.

I bought this little leggings/tank top set at Target:


I folded them down so it would make 3 inch strips:


Now, starting with the shirt, roll it up so it looks like a "cinnamon" roll:
After your finish rolling the shirt, roll the little pants over it. Wrap rubber band around it, so it stays together. It should look like this:


The cupcake wrapper is made with a coffee filter. Using a pencil eraser and some ink, I "stamped" some polka dots on the filter:


Now, place the cupcake in the filter, and secure it to the filter with a rubber band. Sorry, I don't have a picture for that step! The tie a ribbon around the rubber band to cover it up. This is where the fun starts. You want to "mold" your cupcake by adjusting the roll and folds so it looks uniform. Do this until you get the desired look. This is my finished cupcake:


Now, your cupcake is done! If you want to make a fun package for it, the ideas are limitless. You can buy some cupcake boxes from a packaging supply company or make one of your own. I found a ton of box template/ideas online when I "googled" it. I chose to make a bakery/coffee style bag. I don't have pictures of the process, but it was pretty easy. I just took a lunch sack and cut a window out. I attached clear acetate inside the window. In the bottom of the bag, I put a piece of cardboard (3 inches by 5 inches) for added stability. I trimmed about 1 1/2 inches off the top of the bag. After I put the cupcake in the bag, I folder the top over, added a scalloped border, ribbon, a bow and a button. The cupcake embellishment is made using the cupcake from the Cricut Cartridge, From My Kitchen.

Thanks for stopping by,

Beth

Tuesday, March 1, 2011

A Birthday Cupcake for Olivia

*(The tutorial for this project can be found here.)*


I wanted to do something a little different for little Olivia's second birthday. Olivia is the daughter of one of my bff's, Victoria. While I was blog surfing one night, I came across these adorable little cupcakes made out of onesies and receiving blankets. You can see them here. I don't know of anyone who is having a baby and Oscar wouldn't appreciate sporting a onesie, so I had to figure out another way to make these great cupcakes. So, I'm at Target buying cat food, and see these cute little leggings and tank tops, and I thought, why couldn't I use those to make a cupcake?


With a little folding and rolling, the cupcake was formed. The wrapper is a coffee filter that I stamped. I made a little bakery/coffee style bag for the cupcake with a paper lunch sack and some clear acetate. The cupcake embellishment was made using the From My Kitchen Cricut Cartridge.


Supplies:
Paper: Bazzill
Ink: Memento
Misc: Ribbon, rubber bands, pencil, cardboard, clear acetate, cricut, paper lunch sack, nestabilities, pop up dots, coffee filter, dmc floss, ribbon, scor-tape


Tedy wanted to be in the picture! Usually, she is sticking her "license plate" in my face while I am crafting, so I should be grateful that she was face forward.


Make sure you check back tomorrow, I'll be posting a tutorial for this sweet cupcake.

Thanks for stopping by,

Beth