Saturday, October 19, 2013

Catered Crop Orange Is The New Black Recipe Quick Fire


I was so excited that I won the Catered Crop Canning Jar Recipe Swap!  I just love everything that Linda does, so it is quite an honor to be picked not once, but now twice!
 
For this week's recipe swap, we had to use orange.  Well, since Halloween is one of my favorite holidays (after 4th of July and Veterans' Day), this was an easy one.  My two fur babies, or as my sister affectionately refers to them as "Two Tons of Fun", always like to be involved in the crafting process.  If they are not laying down on my projects or sticking their back sides in my face, they are running off with supplies!  So, I decided to make something inspired by them.
 
Using a little orange pumpkin from Target, I made a cat head.  The ears were cut out of American Crafts  Halloween paper.  The eyes were made using a variety of paper punches.  The nose was cut using a heart Nestability and some glitter card stock.  Whiskers were made using some black wire.
 
I used a jar and filled it with some orange candy, some pumpkins and peanut butter cups.  
 
Black tulle was wrapped around the jar and tied into a fluffy bow.  A tag was made using some orange and black washi tapes.  It is complimented with some orange Baker's Twine and a button spider.

 
Supplies:
Stamps:  Papertrey Ink-Boo To You
Ink:  Versafine, Memento
Paper:  American Crafts, Bazzill, Recollections
Misc:  Plastic jar, candy, baker's twine, button spider, wire, paper punches, pop up dots, tag, black tulle, washi tape, Nestabilities, hot glue gun, small pumpkin
 
Make sure to go check out all of the great creations over at Catered Crop, you won't be disappointed!
 
Thanks for stopping by,

Friday, October 18, 2013

Halloween Gable Box

 
With Halloween just around the corner, here is a quick little treat for all of your favorite tricksters.
 
I made the gable box with the Tags, Bags, Boxes & More 2.  Then I wrapped some Graphic 45 paper and some orange ribbon around the box.  A medallion was made using Nestabilities, a paper punch pumpkin, and the stamped sentiment from JustRite Witch Way To The Treats.  The box was finished off with a tulle bow.
 
Supplies:
Stamps:  JustRite-Witch Way To The Treats
Ink:  Versafine
Paper:  Recollections, Echo Park, We R Memory Keepers, Graphic 45
Misc:  Cricut  Tags, Bags, Boxes and More 2 Cartridge, pop up dots, Nestabilities, black tulle, ribbon, paper punches
 
Thanks for stopping by,

Thursday, October 10, 2013

Catered Crop Canning Jar Recipe Swap

 
I decided to participate in the Catered Crop Canning Jar Recipe Swap.
 
The requirements for this recipe swap are:
 
"For this challenge you can use a canning Jar (Mason, Kerr, Ball, etc.) and fill it, alter it, tag it, decorate it . . . what ever you want to do. Or you can create a card (or scrapbook page) with a canning jar on the card."
 
I decided to use Papertrey Ink Friendship Jar and Fall Fillers for my card.  The candy corn was colored with Copics.  The jar topper was stamped, paper pieced, and fussy cut.  Then I attached with pop up dots and tied a bow with some baker's twine. 


I made some tiny spiders using the Memory Box Scary Spiders Die.  I cut them out using some glitter paper and then glued on some tiny buttons for their bodies.

 
Supplies:
Stamps:  Papertrey Ink-Friendship Jar, Friendship Jar Fall Fillers, Boo To You
Paper:  American Crafts, Bazzill, Recollections
Ink:  Versafine, Versacolor
Misc:  Buttons, baker's twine, Copics, pop up dots, ribbon, library card
 
Thanks for stopping by,

Wednesday, October 9, 2013

Jack-O-Lanterns


Just another Halloween Banner.  This time I decided to the entire thing with jack-o-lanterns.  They are made using a combination of my Cricut and some paper punches.  Each one has a different face/expression.  I think that is what I like best about it.
 
A couple of close ups:


Supplies:
Paper:  Recollections, We R Memory Keepers, Bazzill
Ink:  Versacolor
Misc:  Cricut Plantin School Book Cartridge, paper punches, ribbon, Cricut Pretty Pennants Cartridge, pop up dots
 
Thanks for stopping by,


Friday, October 4, 2013

Trick or Treat Goodie Bags

 
I made up these fun goodie bags for Halloween. 


They came together pretty quickly.  I used a few paper punches, Mini Monsters Cricut Cartridge, and the Boo To You Papertrey Ink Stamp set.


Supplies:
Stamps:  Papertrey Ink-Boo To You
Paper:  American Crafts, Recollections
Ink:  Versafine
Misc:  Glassine bags, pop up dots, paper punches, baker's twine, Cricut Mini Monsters Cartridge
 
Thanks for stopping by,

Sunday, September 22, 2013

Nail Polish Spiders

Last weekend, my sister, Jenny, and one of our friends came over for a Craft-A-Palooza.  Our friend, Angie wanted to make some Halloween treats for her nieces and nephews.  Angie had never crafted before, so we helped her make some Scary Ghost Surprises, Best Witches, and another little treat bag that I haven't posted yet. 
 
 Jenny noticed the Lollipop Spiders, and at first glance, she thought they were bottles of nail polish.  Well, that got me thinking.....and this is what I came up with.
 
 
I found these cute bottles of nail polish at CVS for $1.99 each.  Like the Lollipop Spiders, I used some pipe cleaners and some small beads for the legs.  I made some small witch hats that fit over the top of the bottle.  They come off, so you can use the nail polish.  Using the Memory Box Scary Spiders Die, I cut some small spiders and adhered them to the hat which included a small black bow.  The eyes were made using a variety of paper punches and some black Stickles.


They eyes were attached to the pipe cleaners that are twisted around the top of the bottle.


Supplies:
Paper:  Bazzill, Colorbok, Recollections
Misc:  Nail polish, pipe cleaners, beads, ribbon, paper punches, white gel pen, Memory Box Scary Spiders Die, Scor-Tape, pop up dots
 
Thanks for stopping by,


Friday, September 20, 2013

Birthday Girl

 
Just replenishing my card stash and practicing with my Copics.  I could never get tired of the Pure Innocence Stamps, I just love those little girls.
 
This little sweetie is called My Balloon.  When my niece, Katie, was a little girl, she used to call balloons "babaloons", so needless to say every time I pull this stamp out, I think of those "babaloons"!
 
She is colored with Copics, her dress is paper pieced, and she is fussy cut.  I cut a heart with my Nestabilities for the balloon.  I cut one layer out of a chipboard coaster and one layer with my designer paper.  I adhered them together and then applied a layer of Diamond Glaze to give it some shine.
 
Lots of dies were used on this card.  They include:   Quickutz 4 x 4 Notebook Sheet, Papertrey Ink Buttoned Up #1, My Favorite Things Simply Scallops Medium Die,  and Nestabilities Hearts.
 
Supplies:
Stamps:  My Favorite Things-My Balloon
Ink:  Memento, Versafine
Paper:  American Crafts, Bazzill, Wasau
Misc:  Copics, Diamond Glaze, ribbon, button, chipboard coaster, pop up dots, Quickutz 4 x 4 Notebook Sheet Die, Papertrey Ink Buttoned Up #1 Die, My Favorite Things Simply Scallops Medium Die,  and Nestabilities Hearts
 
Thanks for stopping by,

Wednesday, September 18, 2013

Boo Nugget Box

**This is my second post of the day, scroll down to see my Halloween Banners.**


I saw this cute treat box card tutorial over on Splitcoast and decided to give it a whirl.
 
I used my Scor-Pal to make the box.  Instead of my making the tag pocket, I just adhered the two end pieces together.  Then, I added my spooky fence, paper punch pumpkins and a banner made with My Favorite Things Fish Tail Pennant Die-Namics.  Some tiny bat punches completed my banner.
 
Instead of using a punch to make the window where the nuggets are, I used my Coluzzle.
 
Supplies:
Stamps:  Jo-Ann Fabrics-Alphabet
Ink:  Versafine, Memento
Paper:  Echo Park, Bazzill, MME
Misc:  Sizzix Fence Die, My Favorite Things Fish Tail Pennants Die-Namics, pop up dots, paper punches, Coluzzle, clear acetate, Hershey Nuggets, Scor-Pal, Scor-Tape
 
Thanks for stopping by,


Halloween Banners

I've been addicted to banners lately, and decided to try making some of my own.  Here are two I made using my Cricut.
 
The first one is my Bite Me Banner:


The second one is my Boo Banner:


I've listed these in my Etsy Shop.  If you are interested in ordering one, just pop on over!
 
Supplies:
Paper:  Bazzill, Echo Park
Ink:  Memento
Misc:  Cricut, paper punches, Stickles, pop up dots, Alphalicious and Paper Doll Dress Up Cricut Cartridges
 
Thanks for stopping by,


Tuesday, September 10, 2013

Best Witches


Just working on a few Halloween treats. 
 
I made the little bag/box using my Scor-Pal.  The witch's shoes were cut using the 2 x 2 Witch Shoe Quickutz Die.  The stockings were cut out free hand.  I just added some glitter paper punch circles to give them a little spooky texture.  The skirt was made using two layers of flat lace that I gathered and adhered to the bag of the with some Score-Tape.  I only had flat lace on hand, but when I made more I will buy the gathered lace.  The top of the bag was folded down, punched with a border punch, and then I stamped the sentiment.  Using my Crop-A-Dile, I punched holes in the top and threaded some ribbon through and tied it into a bow.
 
Supplies:
Stamps:  Inky Antics-Best Witches
Ink:  Versafine
Paper:  Bo Bunny, Bazzill, Recollections
Misc:  Ribbon, lace, paper punches, pop up dots, Scor-Pal, Scor-Tape, Quickutz Witch Shoe Die, Crop-A-Dile
 
Thanks for stopping by,


Thursday, September 5, 2013

Lollipop Spiders

Here is my version of the timeless Lollipop Spider.


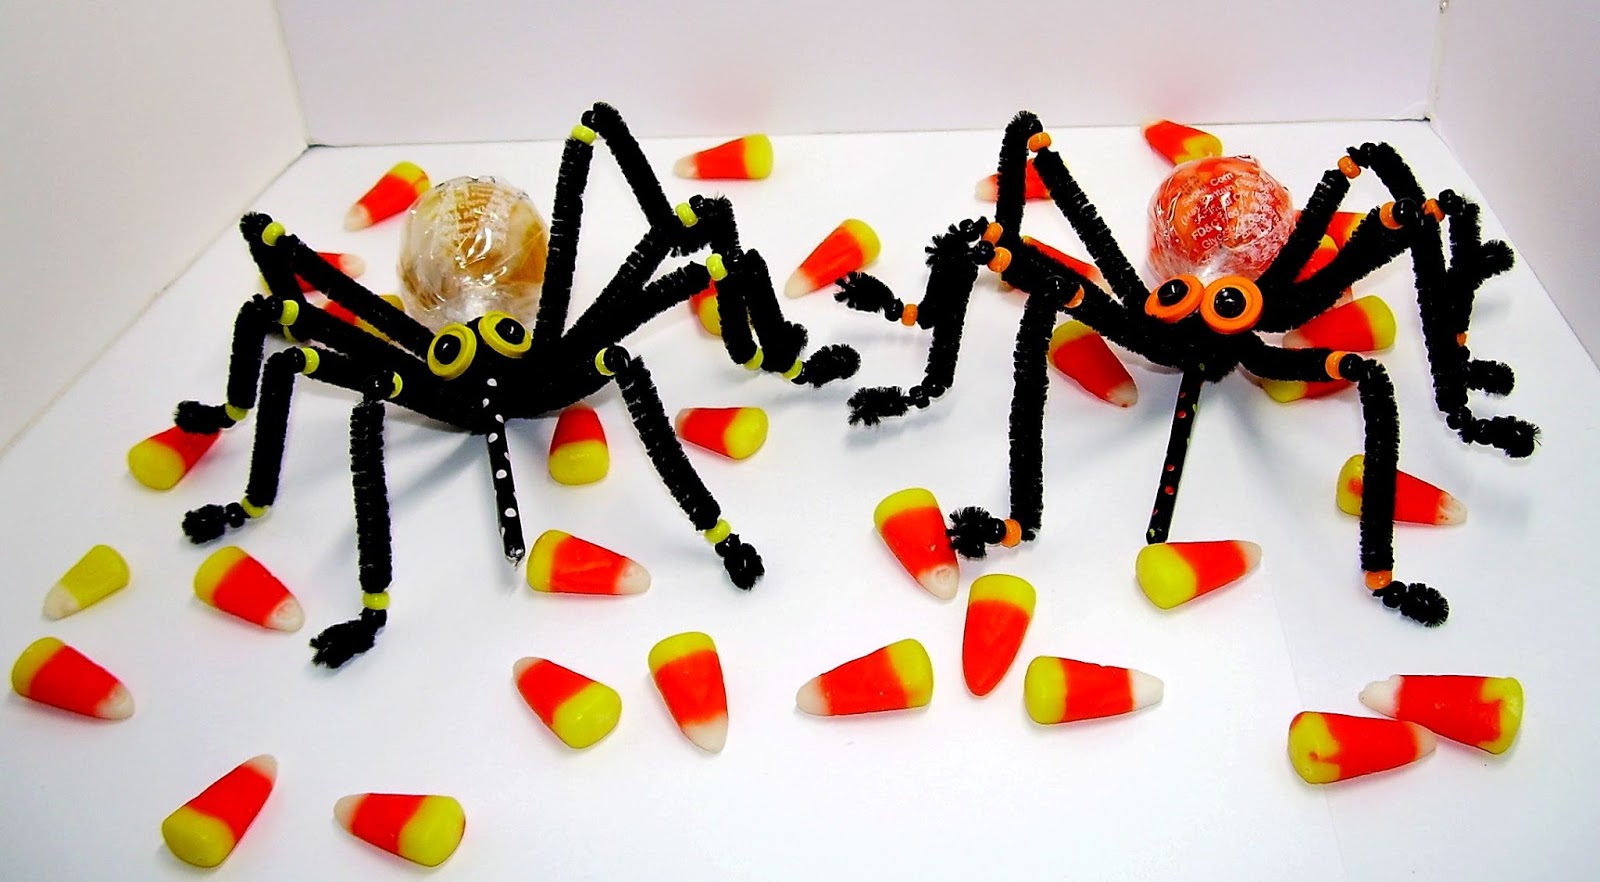
I saw these cool lollipops at the check out at Walmart.  What to do with them?  Why make some spiders, of course!  So, I did.  I covered the sticks with some washi tape.  Using some pipe cleaners and beads, I made the legs.  The eyes were made using buttons.

 
Thanks for stopping by,

Tuesday, September 3, 2013

Scary Ghost Surprise

 
I'm starting to work on my Halloween Treats for the family.  As usual, I was inspired by a cute pin on Pinterest.   Here is the link to Kendra's blog.
 
First, I made a pattern to cut the ghost body out.  Then, I added my own little flair.  The eyes are paper punched and some Stickles were added to her eyelids.

 
I used Hershey Miniatures instead of the Andes that Kendra used.  Using paper punches, I made two jack-o-lantern faces.  Again, I added a little Stickles just to sparkle it up!
 
The sentiment was stamped on the inside of the ghost, and I used my Scor-Pal to make my score lines.
 
To hold the ghost together, I tied some baker's twine around it and made a fun little medallion with Nestabilities and Witch Way To The Treats JustRite Stamp set.
 
Supplies:
Stamps:  JustRite-Witch Way To The Treats and Savvy Stamps-Happy Haunting
Ink:  Versafine
Paper:  Bazzill, We R Memory Keepers, Echo Park
Misc:  Nestabilities, paper punches, pop up dots, Stickles, white gel pen, baker's twine, Hershey Miniatures, Scor-Pal
 
Thanks for stopping by,
 

Friday, August 30, 2013

Life Is Too Short To Drink Bad Coffee

 
Just playing with some stamps and my Cricut.  I'm hoping that some "fallish" colors will urge some cooler weather my way.
 
Using the George Cartridge and the Cricut Craft Room, I made the blurb bubble and stamped the sentiment.  The coffee cups were made using the Love You A Latte Cartridge.
 
Supplies:
Stamps:  Morningstar-Life Is To Short To Drink Bad Coffee
Ink:  Versafine
Paper:  October Afternoon, Bazzill, MME
Misc:  pop up dots, paper crimper, heart paper punch, Cricut, George and Basic Shapes Cartridge, Love You A Latte Cartridge
 
Thanks for stopping by,


Tuesday, August 27, 2013

Back To School Treat Box


Just a little back-to-school present for my favorite teacher.  This was one of my famous in the shower epiphanies!  I am huge fan of Lauren Meader's Timeless Templates.  A few years back she did a video tutorial on how to use a binder clip as a holder for one of her templates.  I though it was a great idea and I very much wanted to try it.  So, the other day, I was thinking about teacher appreciation gifts, and it came to me.  Why not use that same concept on a pencil box for the teacher.  I figured that a plastic pencil box would be more durable for some school supplies than a box made out of card stock.  I went to several stores, but couldn't find what I was looking for.  Then, when I was at JoAnn's with my Mom, they had these 3 1/2 by 5 index card boxes.  Perfect, and they were on sale for 99 cents!  Even better!
 
So, I re-watched the video, you can see it here.  Now, I made a few changes.  Instead of using the Word Window Punch, I just cut a piece of cardstock 3/4 inches by 2 1/2 inches.  Also, because I wanted it to be a little more durable, I made holes into the top of the box then put the brads in.  I was worried that if you lifted the handle, the top panel would fall off.  You could probably use a drill, but I just carefully poked a hole with a pair of scissors, just be careful that you don't stab yourself.  I added a piece of cardstock to the inside of the lid, so you wouldn't see them the brads that popped through.
 
Inside my box, I put a few necessities:  dry erase pens, post it notes, Altoids, Kool-Aid Juice Pouch, Kit Kat Bar, and some Tums.

 
This is the actual box I bought at JoAnn's.

 
To personalize it, I made a simple tag and stamped her name on it with the My Favorite Things Mini Banner Day Alphabet.

 
Supplies:
Stamps:  My Favorite Things-Mini Banner Day Alphabet
Ink:  Versafine
Paper:  Little Yellow Bicycle, Bazzill, Recollections
Misc:  Papertrey Ink Apple Die, Nestabilities, brads, binder clip, ribbon, button, baker's twine, tissue paper, index card box
 
Thanks for stopping by,

Monday, August 26, 2013

Herd It's Your Birthday

Holy moly guacamole, where have been and what have I been doing?! I have no idea!  It's not like I wasn't doing anything, I just seem to run out of time.  I have been spending time in my "Craft Central", but I can't tell you why I haven't posted anything.  Let's see, what has been happening for the last few weeks, other than work. I celebrated my 45th birthday last week!  It was an exciting day.  Mom and I went to JoAnn Fabrics, Hobby Lobby, Michaels and Bath and Body Works!
 
I am so ready for fall and some cooler temperatures.  I'm sick and tired of this disgusting, soupy, gross heat and humidity!  It's making me very grumpy!  I think I will work on some Halloween projects this afternoon to try and woo some cold weather my way.
 
My niece, Jenny, turned 16 this month.  This is the card I just finished making for her, I know better late than never!  She loves her animals, so when I saw the On The Farm set from Papertrey Ink, I knew I had to get it to makes goodies for my Jenny. 
 
The card is just a simple easel card, no big whoop here.  To personalize it, I just added a banner with her name.  I am infatuated with banners lately, and I have been pinning them all over Pinterest as of late.
 
 
I wish I could say that the cake was my idea, but it wasn't.  I found it on Pinterest, which is pretty much where I find everything.  Here is the link to Lisa's blog where you can get all of the deets to make this little cake.
 
Inside view of the cake.  I stuffed some dinero down there for her to feed her Bath and Body Works addiction or something for her favorite horse, Pebbles, at the barn.
 
 
I used Nestabilities and the On The Farm Dies to make the "candles" for my cake.

 
One last shot of the set together.
 
 
Supplies:
Stamps:  Papertrey Ink-On The Farm
Ink:  Versafine, Tim Holtz, Memento
Paper:  October Afternoon, MME, Bazzill, Sn@p
Misc:   Hershey Miniatures, low temp glue gun, Nestabilities, baker's twine, pop up dots, paper punch flowers and leaves, toilet paper roll, paper shred, Papertrey Ink On The Farm Dies, half pearls, Memory Box Scallop Border Die
 
Thanks for stopping by,


Tuesday, August 13, 2013

Sew Lovely

 
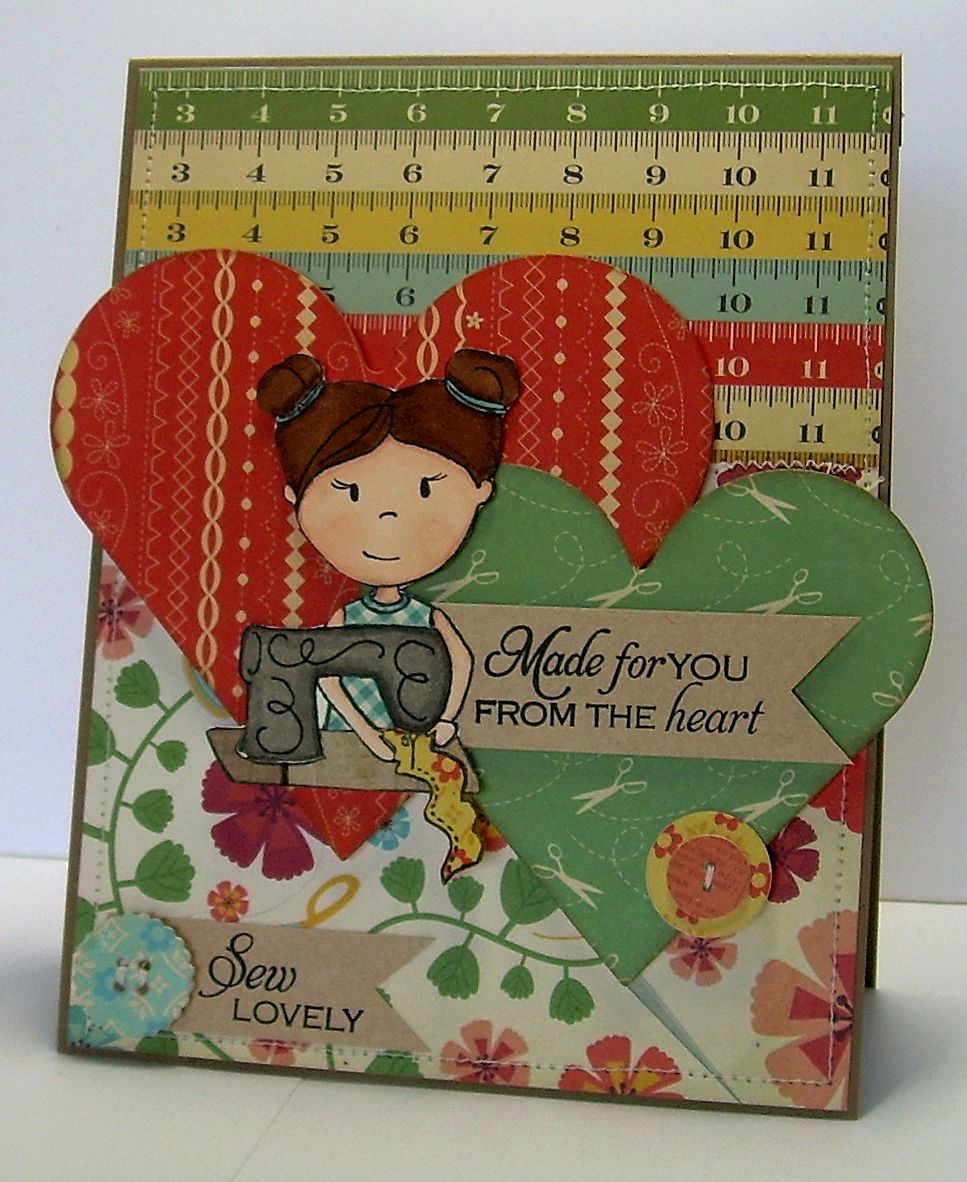
So, I found this great stamp company at the last rubber stamping show that we went to.  It's called The Paper Nest.  I just love the little boys and girls that she has drawn and I bought two, but I will be definitely buying more as they are just adorable.  If you need immediate gratification, you will be happy to hear that The Paper Nest also has digital stamps!
 
This little sweetie is called Sewing Avery.  I decided to buy her first as my first love is sewing.  I colored her with Copics,  Another great thing that the Paper Nest does on their blog is the color combinations for hair and skin.  I signed up with my e-mail address and nearly every day, I receive new skin/hair Copic  hair/skin color combos.  I especially like this as I am still trying to master the art of Copic coloring!
 
After I finished  coloring, I did some paper piecing with some scraps of Cosmo Cricket paper that  I had.  The hearts are made with Nestabilities.  The sentiments come from The Craft's Meow Sew Lovely set.  Paper buttons were made using Papertrey Ink Button dies.
 
Supplies:
Stamps:  The Craft's Meow-Sew Lovely and The Paper Nest Dolls-Sewing Avery
Ink:  Versafine, Memento
Paper:  Cosmo Cricket, Neehah, Bazzill
Misc:  Copics, pop up dots, Nestabilities, Papertrey Ink Button dies
 
Thanks for stopping by,