Wednesday, December 31, 2014

Santa...I Know Him!!!

It seems I did manage to take a few pictures of some items from my "work/craft-a-thon"!  


I made some  paper punch Santa faces, added a computer generated sentiment, and viola, you have Santa-Tizers!


Using those same faces, I made some Santa nail polishes.  I just added little belts made out of cardstock and some tiny buttons.

Supplies:
Paper:  Recollections
Misc:  Paper punches, baker's twine, buttons, Cuttlebug Swirls Embossing Folder, black Sharpie pen, pop up dots, pom poms

Have a safe and happy New Years Eve!

Thanks for stopping by,


Tuesday, December 30, 2014

Simple Smile Card


A quick bit of sunshine before I head off to work.  It's a dreary and rainy day here, perfect for watching the Law & Order SVU marathon and crafting, but, I unfortunately I can'!

Supplies:
Stamps:  Penny Black-You Make Me Smile
Ink:  Versafine
Paper:  American Crafts, Paper Studio
Misc:  Nestabilities, paper punch flowers, pop up dots, My Favorite Things Dainty Bows Die-Namics, button

Thanks for stopping by,


Monday, December 29, 2014

Warm Birthday Wishes Tag

What the heck happened to Thanksgiving?!  I can't believe that I haven't posted in almost 2 months, really?!  I've been crafting/creating my life out, too.  I wish I had pictures to show, but, of course, I was so pressed for time that I didn't take any.  We won't mention that my blog got hacked, and it wouldn't let me access to it unless I purchased a domain for it?!  Thanks to two nice gentlemen from Google, I was able to fix it and not have to pay anything.

Let's see, I've worked Thanksgiving, Black Friday, Christmas Eve, and Christmas Day.  For all of our great team members that worked that those days, I made small gifts to show how grateful we were that they came to to work on those days.  So, that would be anywhere from  45-60 people at our venue, multiply that times 4 holidays and that equals way too many to count.  I also did a small craft fair in early December.  The holidays are some of the busiest days for our us here in the tourist area of Central Florida.  Basically, I would get up early craft, go to work, come home, craft, go to bed and just repeat every day......  (Did I mention that I ride my bike to work every day and it's 6 miles each way?)

Additionally, I did some holiday baking.  I sent boxes of homemade treats to my Dad and Brother up in Massachusetts.  I did make some pretty neat tags with my Cricut for the goodies, and even kept an extra one that I will be posting.  

Today, I made a tag for my Mom.  Her birthday is coming up, and she has been reminding us of it!  In our family, we are very proud of our ages and make no effort to hide them.  We love our birthdays!


Of course, I used two of my favorite companies, My Favorite Things and Papertrey Ink.  This tag was perfect to compliment a pretty bottle of hand soap from Bath and Body Works.  I just love that store and could spend lots of $$$ that I don't have in there!


Supplies:
Stamps:  Papertrey Ink-In The Meadow, My Favorite Things-Ice Princess
Paper:  MME, Neenah, Recollections
Ink:  Versafine, Memento
Misc:  Ribbon, sewing machine, pop up dots, rhinestones, Scallop Border Die-Namics, Papertrey Ink Snowflake Die from Winter Penguin Additions, Copics

Thanks for stopping by,

Monday, November 3, 2014

Nail Polish Snowman

Hello and Happy November!  It's actually starting to cool down here, and I am definitely loving it.  It's been an incredibly hot summer and fall this year.  

For the the past several weeks, I've been hunkered down at my table,  a.k.a Craft Central, getting Christmas stuff done for an Open House I did over the weekend.  I've punched, stamped, embossed, cut, glued and colored until all hours at night to just to get things finished!  So, I am going to start sharing with you some of the goodies I made.

I have decided that I am definitely taking the nail polish thing a little too far, but they are cute and inexpensive gifts/decorations.

So, without further ado, here is my Nail Polish Snowman:


As you  can see, a few punches, a little Cricut-ing, and a pretty lace scarf is all it took to dress up this $1.99 bottle of nail polish.  They are quick, easy, inexpensive and a great way to give a little holiday cheer.

Supplies:
Paper:  Bazill, Recollections, K & Company
Misc:  Lace, baker's twine, paper punches, pompoms, pop up dots, black Sharpie pen, white gel pen, Cricut Paper Doll Dress Up Cricut Cartridge

Thanks for stopping by,

P.S.  I have some kits to makes these in my Etsy Shop,

Thursday, October 9, 2014

A Halloween Pez Treat

Did you see the cute Valentine's Day Pez Holders that Amy Rohl made on Pinterest?  They are just the cutest, here is a link to her blog, Ink About Me, so you can check them out.  I spend way too much time on Pinterest, but there are worse things that one can be addicted to!  

I found these Halloween Pez Dispensers at Target, or as I refer to it, my second home!  I couldn't decide which one I liked better, so I ended up buying a few different ones.  

The pattern is basically the same one I made for the Wizard Lollipop/Cake Pop Holders.  I made it just a little bit smaller so that the scallop circle would fit nicely underneath the Pez head.  The sentiments are from the JustRite "Witch Way To The Treats Set".


Supplies:
Stamps:  JustRite-Witch Way To The Treats
Ink:  Versafine
Paper:  Recollections, Bazzill, Echo Park, Graphic 45
Misc:  Cricut, paper punches, baker's twine, pop up dots, Pez Dispensers

Thanks for stopping by,

Wednesday, October 8, 2014

I Only Have Eyes For You


I love Halloween, I love Halloween candy, and I love making Halloween candy crafts!  I made these I Only Have Eyes For You tags to match with those scary chocolate eyeballs I found at Target.

The sentiment is computer generated.  I used Nestabilities to make the tag layers and some paper punched eyeballs provide a little extra scare!  I also added some washi tape flags and baker's twine from the Halloween Mini Embellishment Kit to dress up my tag a little.This is one of those projects that started out as a clean and simple tag, but I kept thinking "Oh, this would look cute, I think I will add this!".

I put the eyeballs in a mini paint can.  On the top of the can, I adhered a circle of matching paper and some of the tiny button spiders that are also from the Halloween Mini Embellishment Kit.  I tied a tulle bow on the handle and decided that was it, it was finished!


Supplies:
Tags:  I Only Have Eyes For You
Misc:  Mini pain can, chocolate eyeballs, Halloween Mini Embellishment Kit, black tulle

Thanks for stopping by,

Thursday, October 2, 2014

Wizard Lollipop/Cake Pop Holders


My brother-in-law is a huge Harry Potter fan.  I've been busy trying to perfect my cake pop recipe/decorating skills, so I decided to make some lollipop/cake pop holders.  This led to some Harry Potter inspired cake pop holders.  I'm going to surprise him with this special treat.  I've had several flat tires on my bicycle this summer, and he has always been there to come "rescue" me!

A combination of paper punches and my Cricut, I was able to make these little guys.  I am very pleased with the way they came out and I can't wait to show Ted!

Supplies:
Paper:  Coordinations, Bazzill, Recollections
Misc:  Paper punches, baker's twine, pop up dots, black Sharpie pen, Cricut Paper Doll Dress Up and Bags, Tags, & More Cartridges

Thanks for stopping by,


Wednesday, October 1, 2014

Teacher Pails O'Fun

It's never too early to start your holiday shopping/crafting for your favorite teacher!  I decided that my favorite teacher needed a Pail O'Fun to put on her desk.  This size is perfect, not too big and not too small, to hold everything she and her students need to get through their day.


To complete this great gift, I made a pretty, but simple card, to let her know how much she is appreciated.


Ready to get a jump start on your gift giving, hop on over to my Etsy shop to pick one up today.  Don't forget that I also have a digital version of the pattern for the Pail O'Fun also available for all of my fellow sewing friends.

Supplies:
Stamps:  My Favorite Things-Talk Nerdy To Me and Papertrey Ink-Vintage Picnic
Paper:  Bo Bunny, Recollections, Nennah
Ink:  Memento and Versafine
Misc:  Pail O'Fun cover, Papertrey Ink Banner Die, pop up dots, Copics, Leaktite Pail

Thanks for stopping by,

Tuesday, September 16, 2014

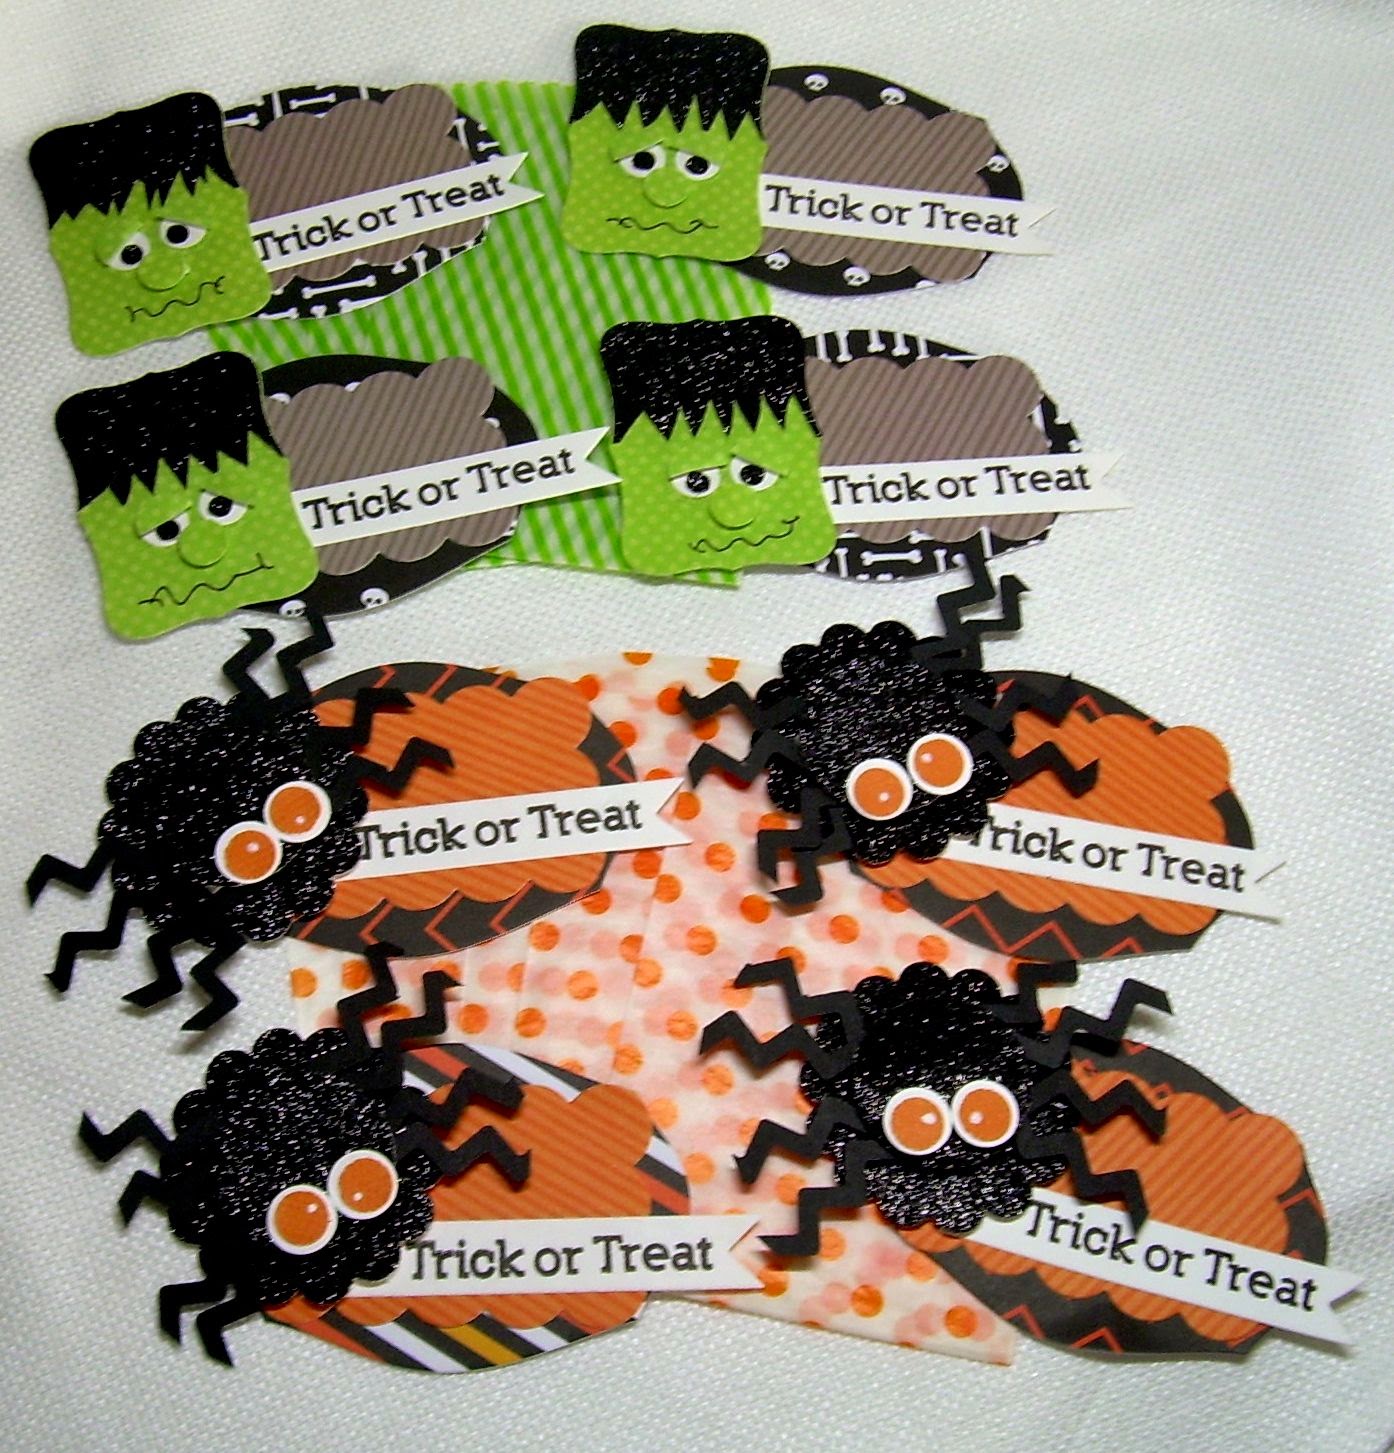
Trick or Treat!!!

I saw these wicked cute little Halloween Tags on Pinterest.  They were made by Jen Del Muro for the Reverse Confetti Blog.

I decided to make some of my own, using supplies from my stash.  I am trying really, really, really hard not buy anything new!

So, here's my version....


Using a variety of paper punches, Nestabilities, and some dies, I made both a spider and a Frankenstein.  


I covered some Hershey's Miniatures with some spooky paper and tucked them in the little bags.   For some reason, I can never make just one of anything!


Supplies:
Stamps:  My Favorite Things-Spider Web
Ink:  Versafine
Paper:  Recollections, American Crafts, Paper Studio
Misc:  Paper punches, Sharpie pen, pop up dots, stapler, paper treat bags, white gel pen, Nestabilities, Papertrey Ink Dies-Double Ended Banner, Mat Stack 1, Fillable Frames 5, candy

Thanks for stopping by,

Sunday, September 14, 2014

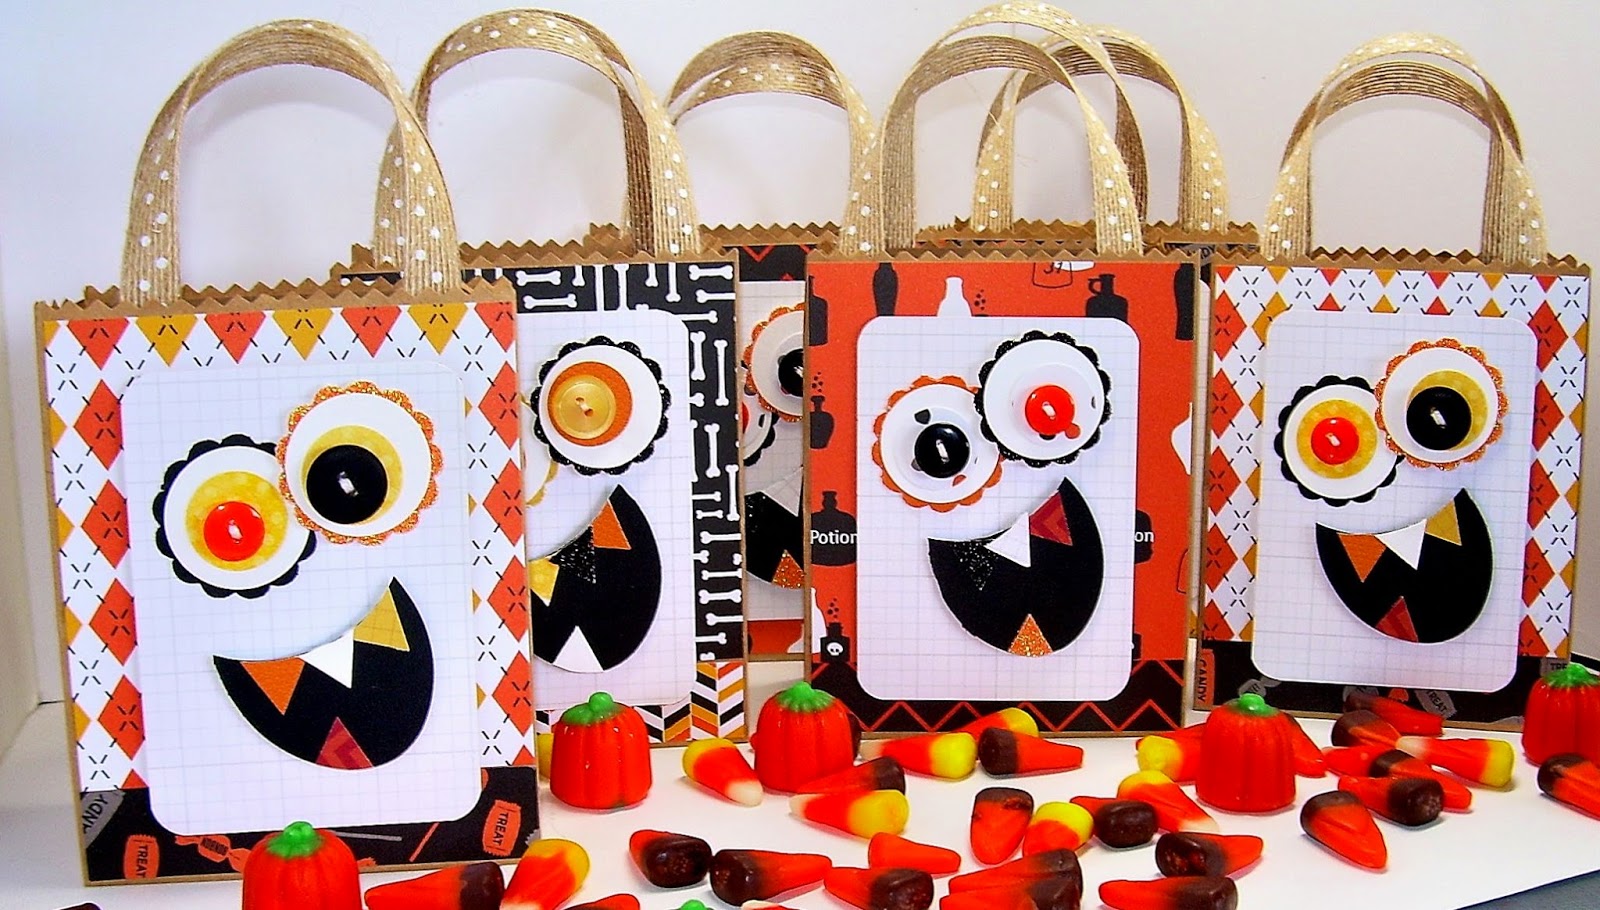
Monster Bags!


I bought my first bag of Autumn Mix of this season and I just had to make up a little treat bag to hold it, before I ate it all!

Using some small paper sacks and ribbon, I made these little shopping bags.  All it took was a  few paper punches, buttons and some scary paper to complete my bags.


Supplies:
Paper:  American Crafts, Recollections, Simple Stories, Bazzill, Bo Bunny
Misc:  Paper punches, ribbon, pop up dots, buttons, small lunch sacks

Thanks for stopping by,

Tuesday, September 2, 2014

Mini Album Explosion/Etsy Shop Update

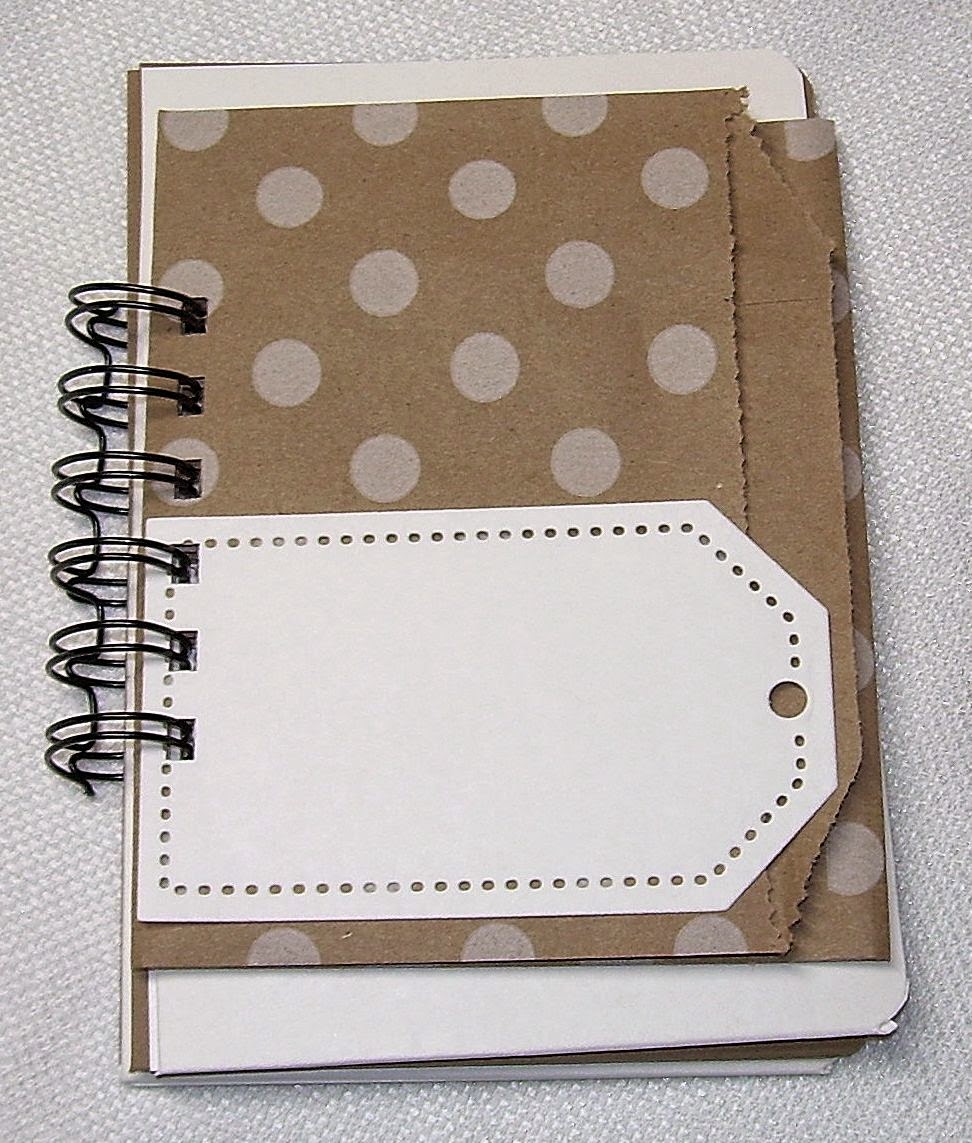
I have just listed some blank mini albums that I have been working on in my Etsy Shop.


Also, I have marked down a lot of holiday merchandise, so check out the great deals in my Etsy Shop.

Thanks for stopping by,

My First Mini Album

So, I got to make something really cool.  A teacher friend of my sister's, whose son is also in the Army, wanted me to make a special birthday gift for her boy.  It seems that young Hero will be turning 21 and he is currently deployed in Iraq.  His Mom wanted something special for this special birthday since he will be so far away from home.  Well, I was quite honored to be a part of this gift.  She wanted some type of mini album that she could send some special pictures and sweet words all in one place.  I have never really "scrapbooked" before, since I mostly make cards and stuff, so I was up for the challenge.  I decided to make a tag style mini album that would be easy to ship and easy for him to carry with him as he is protecting our freedom.

I decided to use my favorite color combination:  Red, White, and Blue!


There are five tags/pockets and they measure approximately 8 inches by 5 inches.  I decided to make the pockets a little extra roomy so she can put 4 inch by 6 inch photos in each one.


I wanted to use this quote from Will Rogers, it's one of my favorite stamps:


When, I finished this, it got me thinking, what a great thing to give someone special who is far from home.  So, I decided to make up some blank tag books, which started a chain reaction, and I ended up making some little journal books with my Bind-It-All!  While I was making these, another teacher friend of my sister's, whose son will be graduating from Basic Training soon, also wanted one as a graduation present!

Supplies:
Stamps:  Verses-Will Rogers quote, My Favorite Things-Big Greetings
Paper:  October Afternoon, Recollections, Bazzill
Ink:  Versafine
Misc:  Cricut, Bags, Tags & More Cartridge, buttons, paper punches, Stars Die-Namics, star brads, Nestabilities, book ring, Papertrey Ink Alphabet Die

Thanks for stopping by,
Friday, August 29, 2014

Nail Polish Cupcakes Tutorial


Here is the tutorial to make the Nail Polish Cupcakes.  I decided to a Halloween theme to demonstrate the versatility of this project.  Plus, it's an excellent non-candy treat for your favorite trick or treaters!

You will need one of these, Wilton Nut & Party Cups:

Nut & Party Cups

First, I cut three strips of 1 3/4 inches patterned paper.  Then, using my handy dandy Scor-Pal, I scored every 1/4 inch of all three strips.


Glue all three strips together to make a circle.


Using a hot glue gun, carefully glue your circle around the cup.  This will be the "cupcake" wrapper.


This next step is optional.  I wanted to make my cupcake "taller", so I hot glued the top of a prescription bottle to the bottom of the nut cup.  Then, I adhered, the bottle of nail polish with a small pop up dot to the prescription bottle top.


The frosting was made with some orange paper shred that I just bunched around the stem of the nail polish bottle.


To decorate my cupcake, I made a festive cupcake pick and accented with some tiny button spiders.


Supplies:
Stamp:  Stampendous-Bugs & Hisses
Ink:  Versafine
Paper:  American Crafts, Bazill, Recollections
Misc:  Hot glue gun, pop up dots, Wilton Nut & Party Cup, Nestabilities, Paper punches, tiny button spiders, prescription bottle cover, spider web die cut, paper shred, nail polish

Thanks for stopping by,

Friday, August 15, 2014

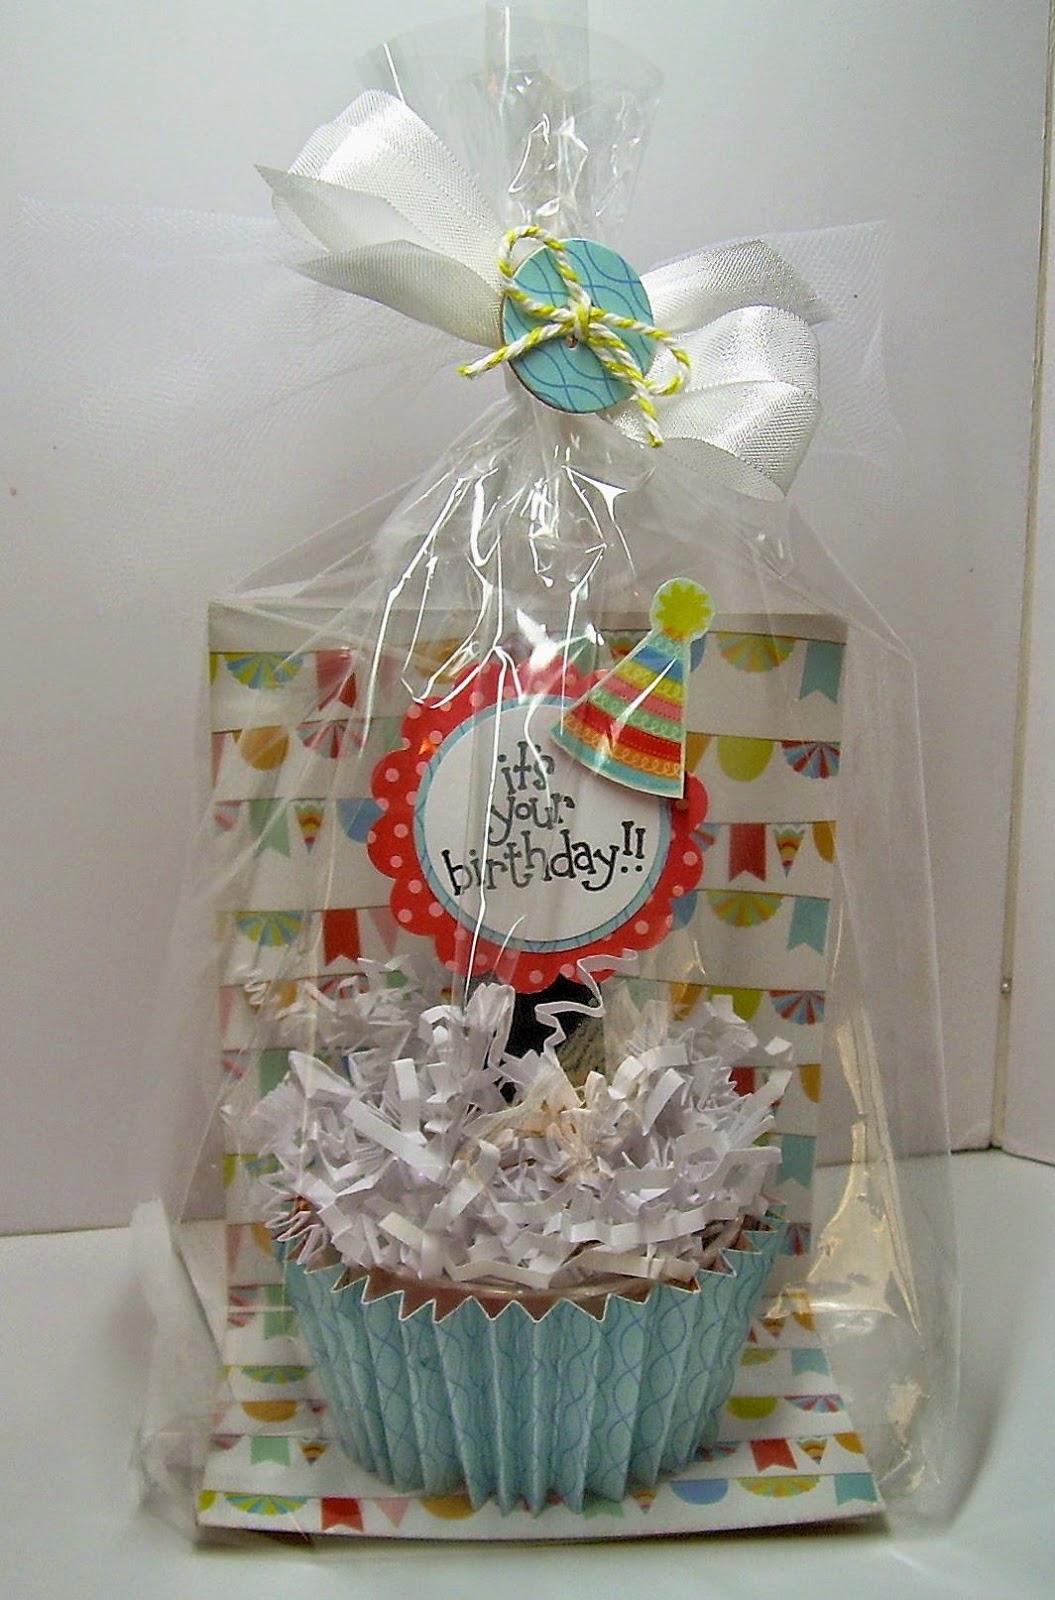
Nail Polish Cupcakes

So, while surfing on Pinterest the other day, I found these really cute cupcakes made with nail polish bottles.  Thinking to myself, I want to make these, how can add my own personal touch? Well, this is what I came up with....


Using my handy dandy Scor-Pal and some Wilton Party Cups, I went about making my cupcake base.  The icing is made with paper shred.  I punched/stamped my "cupcake pick" and adhered to the top of the bottle.  To add a little birthday flair, I fussy cut one of the images from the paper and covered it with Diamond Glaze.


To make a cute packaging, I just made took some cardboard and covered it with paper.  I placed it in a party favor bag.  The bag was tied with some tulle and seam binding.  A handmade matching button finished my project.


I think that these would make great party favors.  If anyone is interested in tutorial, just drop me a comment, and I will get straight to work!

Supplies:
Stamps:  Dandelion Designs-Sentiment
Ink:  Versafine
Paper:  MME, Bazzill
Misc:  Nail polish, party favor bags, poster board, Wilton Party Cups, paper punches, paper shred, "riser" (to put the nail polish bottle on to make it taller), hot glue gun, Papertrey Ink Button Die, baker's twine, tulle, seam binding, Scor-Pal, Diamond Glaze

Thanks for stopping by,

Thursday, August 14, 2014

Party Like A Patriot!


It's back to school time here in Florida.  Here is quick gift I made for my favorite teacher.  I found this cup on the clearance rack at Kirkmans.  I thought this would be perfect as my favorite teacher not only teaches history, but like me is a huge New England Patriots fan. 


I cut an apple using my Cricut, then I alternated strips of red and white cardstock.  One simple star embellished with a button and a baker's twine bow was adhered to a scrap of blue cardstock.


To personalize my gift, I cut a simple pennant free hand.  Using a sentiment from one of my favorite stamp companies and some letter stickers, I completed my gift.

Supplies:
Stamps:  Dandelion Designs-To My Teacher
Ink:  Papertrey Ink, Momento
Paper:  Simple Stories, Recollections, Unknown designer paper scraps
Misc:  Baker's twine, Disney Classics Cricut Cartridge, pop up dots, button, My Favorite Things Star Die-Namics, seam binding, travel cup

Thanks for stopping by,

Sunday, August 10, 2014

Pencil Banner


Here is a great banner to welcome your favorite teacher and students back to school!  It was fun and fast to make!  I just cut some pencils out for each panel, then used my Cricut  to cut the letters out.

Supplies:
Paper:  Recollections, Bazzill
Misc:  Ribbon, Criuct,  Alphalicious Cartridge, circle paper punch

Thanks for stopping by,


Friday, August 8, 2014

A Simple Smile


They say "less is more", so I decided to give it a try with a simple card.  I love this sentiment and I thought it would go perfect with a few flowers and a scrap of burlap.

Supplies:
Stamp:  Penny Black-You Make Me Smile
Ink:  Versafine
Paper:  Recollections, Echo Park
Misc:  Buttons, burlap, Papertrey Ink Flower Dies, pop up dots

Thanks for stopping by,