Tuesday, May 31, 2011

Birthday Medallion Gift Bag


I saw this great gift bag at Mona Pendelton's blog, Cupcake Creations. You can see it here.

I've been admiring the medallions in Michaels and really wanted to make one. I bought the cork board flowers at Michaels in the clearance section. This was used as the base. Then, I cut a long strip of paper 12 inches by 1 3/4 inches. On one side, I punched the border. Along the short side of the strip, I scored every 1/4 inch, then folded it accordion style. Bring both ends together and use sticky strip, or something strong like that, and attach. I adhered that to the cork board base. Using Nestabilities, half pearls, ribbon streamers, and a stamp from Dandelion Designs, I completed my medallion.


Supplies:
Stamps: Dandelion Designs-It's Your Birthday
Paper: Imaginisce, Bo Bunny, Recollections
Ink: Memento
Misc: Ribbon, button, half pearls, kraft gift bag, flower cork board, paper edger, pop up dots, dmc floss, sticky strip


Thanks for stopping by,

Monday, May 30, 2011

Teacher Bitty Bags

****(This is the second post of the day, scroll down to see the first.)****


I just listed some Teacher Bitty Bags into my Etsy Shop. I've had several requests for them for end of school gifts. These are little bigger than the previous ones. I was watching the Bruins game while I was cutting the fabric, hence, that is the reason why I wasn't paying attention! They are approximately 9 1/2 inches by 10 inches.

Thanks for stopping by,

Big Bucket of Teacher Treats!

I've going through a crafting withdrawal! Two of my co-workers were off this weekend, so I had to work a bunch of extra shifts, including three doubles. I usually craft before I go into work, but there wasn't any time. If I wasn't mixing drinks, I was sleeping!

Today, Laura came and we went to Violette's. Yay! If you ever in the Central Florida area, you definitely need to check the store out. They also do mail order. You check them out here. We both got some goodies and I'm anxious to use them up.

Here is another Teacher Appreciation gift I made for my favorite teacher. I bought one of those ginormous containers of cheese balls at Target. After the cheese balls were gone, I didn't have to heart to throw it away. As my Mom would say, I "tricked" it up! First, I filled it up with the teacher's favorite treats: circus peanuts, Twizzlers, little cans of Diet Coke, Chex mix, and some cookies. Then, I made a belly band using chalkboard paper. Using the Preserves and Doodlecharms Cricut Cartridges, I cut out some apples and school buses and adhered them on with pop up dots. I added a paper punched border and some ribbon to finish it off. I wrote her name on the front, and my name on the back. Inside the jar is a piece of chalk, just in case she wanted to write on the chalkboard.


This is a great gift ideal for a teacher who can also share it with her/his family. Mrs. Lindsay-Zahn does a ton of extra stuff for her students that often takes time away from her family. This would include taking her students on a bus trip to Washington D.C., sewing 36 dresses (yes, 36 dresses!) for the high schools production of Hair Spray, Grad Night at Universal Studios, not to mention all of her own money on spent on school supplies like copy paper for their handouts and exams. With four teenagers and her husband, they will enjoy this treat!

Side view:


Back view:


Supplies:
Paper: Recollections, Chalkboard Paper from Michaels, Colorbok
Misc: Large plastic jar, cricut, pop up dots, chalk, paper shred, treats, ribbon, paper punch


Thanks for stopping by,

Wednesday, May 25, 2011

Papertrey Ink Flower Blog Hop


Today is the day for the May Blog Hop at Papertrey Ink. The challenge was to use flowers.

I decided to to make another post it note holder with an acrylic frame. The frame size is 4 inches x 6 inches. Utilizing two Papertrey Ink stamp sets, Flower Fusion #1 and Fillable Frames #5, I created my header.


First, I cut the frame out using the Fillable Frames #5 die. The border and sentiment was stamped on with Cottage Ivy Memento Ink and Versafine Black Ink. Then, I cut out the flowers with the Flower Fusion #1 die and then stamped on them with Versamark Ink. For the leaves, I stamped the stems with Cottage Ivy Memento Ink and then cut out just the leaves. Since I love using buttons as the centers for flowers, I threaded them with some white DMC floss and glued them on to the flowers. I hand cut the banner behind the header and attached it to the frame using pop up dots. The base paper is from American Crafts. A post it note was adhered to the frame. I quickly altered a RSVP pen and tied a pretty shear polka dotted bow to complete my gift.

Thanks for stopping by,

Monday, May 23, 2011

Wishing You A Beautiful Butterfly Day Card

This is a quick card I made that I cased from Michelle Wooderson. She does the most beautiful cards.


I used one of my favorite sets from My Favorite Things, Framed Greetings, for my sentiment. It was a really simple card to make. I used my Die-Namics scalloped border that my Mom bought me for Mother's Day and the butterfly set that Oscar and Tedy bought me for Mother's Day. The little doily is from Martha Stewart. I just added a few rhinestones and button to complete the butterflies. I made a bag/envelope with a tiny clothespin with a complimentary butterfly to match. The edge of the bag was punched with the Fiskars border punch.


Supplies:
Stamps: My Favorite Things-Framed Greetings
Ink: Versafine
Paper: Picket Fence Lilybee Design, DCWV, Bazzill
Misc: Die-Namics, rhinestones, doily, button, clothespin, modge podge, paper bag


Thanks for stopping by,

Wednesday, May 18, 2011

Teacher Post It Note Set

I wanted to make a teacher appreciation gift that my favorite teacher could use at home. So, I chose this pretty blue paper from Jillibean Soup, which just happens to be her favorite color.

The base is a 5 x 7 acrylic frame. I inserted a piece of the designer paper in the frame. I bought the butterfly cork board at Michaels, they came in a package of 8. I layered three of them together as they were little thin. Using sticky strip, I adhered a post it note pad to the frame.


Using my two of my favorite stamp companies, Papertrey Ink and My Favorite Things, I got to work. My Favorite Things Die-namics were used to cut the butterflies and the scalloped strip behind the sentiment. I used the Papertrey Ink set, Teacher's Apple to stamp the sentiment on a the Mat Stack #1 die cut. Some paper punched flowers and flowers completed the header. I altered a few thumb tacks by gluing one some more paper punched flowers and a tiny butterfly. To finish the project off, I altered a RSVP pen with some more paper and a butterfly. Seam binding was wrapped around and tied into a pretty bow.


Supplies:
Stamps: Papertrey Ink-Teacher's Apple
Ink: Versafine
Paper: Jillybean Soup, Bazzil
Misc: Acrylic frame, thumb tacks, post it note pad, rsvp pen, seam binding, pearls, paper punches, foam dimensional tape,butterfly cork board, mft die-namics, papertrey ink mat stack die


Thanks for stopping by,

Tuesday, May 17, 2011

Woody Clipboard and Tissue Box Set

I made this set for my niece, Sam, who was diagnosed with leukemia last month. She loves Woody from Toy Story, so I decided that I needed the Toy Story Cricut Cartridge to make some goodies for her room. She has been going through chemotherapy and has been very brave. My sister and brother in law took her to the Girl Scout Banquet as she was to get a very big award for her service at the Winnie Palmer Hospital, but she was so sick, that they had to leave before she could get her award. I know this will not make up for the prestige of the Girl Scout award, but, hopefully this will make her smile.

In Papercrafts 350 Cards & Gifts, Kim Kesti made this adorable clipboard with a Scrabble tray and letter tiles. I wanted to make these, and since I had some clipboards already, I got to work. Designer paper was Modge Podged on to the clipboard. I added some carnival tickets as a border, then applied some stars that I had cut out with Stand and Salute Cricut cartridge. I glued the letter tray on and tied some ribbons on the "clippy" part of the clipboard.


Now onto Woody. He is 10 3/4 inches tall. I cut each layer twice and I layered them with pop up tape to give him some dimension. The Woody on the tissue box was cut at 3 1/2 inches tall, cut and assembled the same way.


I made the tissue box cover using the tutorial provided by Splitcoast. I made a belly band out of cardstock, wrapped bakers twine around, and centered some stars with button centers on each side.


This is the side view:


Supplies:
Paper: Bo Bunny, TPC Studios, Recollections, Bazzill, Colorbok
Cricut Cartridges: Stand & Salute and Toy Story
Misc: Pop up dots, srabble tray and letters, bakers twine, carnival tickets, buttons, modge podge, clipboard, tissue box, nestabilities, ribbon


Thanks for stopping by,

Monday, May 16, 2011

Teacher Candy Box


I saw these great teacher appreciation gifts from Deck the Halls of Home with Joy while I was blog surfing one night. Then, I came across these great cards at Kards by Kadie and decided to combine them into one gift.

The box is an embroidery floss organizer box that I bought at Jo Ann Fabrics. They are inexpensive and you can find them at Michaels and Walmart as well. I filled it with my favorite teacher's favorite candies. I know it looks like a lot of candy, but my favorite teacher has a husband and four teenagers living at her house, so it probably won't last very long! You can put school supplies in it, but since it's going to be and end of the year gift, I decided to just put treats in it.


The pencil was really easy to make. I used my Scor-Pal to make the ridges in the pencil.

Supplies:
Stamps: Dandelion Designs-Sentiment
Ink: Versafine
Paper: TPC, Bazzill, The Paper Company, Recollections, Bo Bunny
Misc: Ribbon, pop up dots, scor-pal, candy, embroidery floss box, candy, paper punches, nestabilities, apple brad


Thanks for stopping by,

Wednesday, May 11, 2011

From The Desk Of ...Hello Kitty


In the dollar sections of Michaels and Target, they have all of this cool Hello Kitty stuff. I decided to make some more desk sets using these goodies. The template comes from one of Lauren Meader's, My Timeless Templates. It is called "From The Desk Of". It can be purchased/download from Papertrey Ink.

The Hello Kitty head was made using the original Sizzix Hellow Kitty Face with Bow die. I cut it out twice and sandwiched pop up dots between the two layers.


Each desk set comes with four mini file folders,(that I cut with my Coluzzle), seven Hello Kitty pencils, a Hello Kitty eraser set, and a pink mini compartment box. The mini compartment box has a variety of paper clips, Hello Kitty stickers, tacks, a pink plastic mini clothespins.


Supplies:
Paper: Recollections, DCWV
Template: My Timeless Template-From the Desk Of
Misc: Sizzix, paper punches, coluzzle, pop up dots, Hello Kitty office/school supplies, scor tape


Thanks for stopping by,

Monday, May 9, 2011

Happy Mother's Day Cards

I hope all of the mother's had a nice Mother's Day. Here are two more cards that I finished yesterday, but didn't have time to post.

The first one I gave to my Mom:


The next one was a card and bag/envelope set that I whipped up for one of my managers to give to his wife. She likes ladybugs, so I used the paper punch lady bug from Dawn's Stamping Studio. Check it out here.


Supplies:
Stamps: Loralie-Charlotte, Papertrey Ink-Blooming Button Bits
Ink: Versafine, Memento
Paper: Bazzill, Recollections, Martha Stewart, My Mind's Eye
Misc: Copics, paper punches ribbon, clothespin, pearls, rhinestone hearts paper sack, pop up dots


Poor Oscar, I had to take him to the vet this morning. His mouth was open, sticking his tongue out, and he was drooling. Then he would start to gag. The maintenance man at my apartment drove us to the vet. The doctor said he had a bad tooth and it needed to be extracted. The doctor would do it today and he said he would call me as soon as it was done. As promised, Dr. Raymond call me an hour later and told me he had to extract 3 teeth! He said Oscar was doing fine and he could come home later in the afternoon. I was so proud of myself, I didn't cry. I always get so upset when the kitties are sick. My Mom and Chuck came and we went out for lunch and then to Violette's, the greatest scrapbook/rubber stamp store. My Mom bought me a scallop My Favorite Things Dienamic as my gift for Mother's Day. The last few years, she has been buying me a gift for Mother's Day. I can't have children, so it can be a little sad for me this time of the year. But, I'm so excited, I've been wanting this particular die for a wicked long time! My Mom really like all of the cards I made her and her gift card to buy books for her Kindle. Oscar is now home, he is a little lethargic and I'm $300.00 poorer, but he is worth every penny!

Well, the Celtics game is on, so I gotta go.....

Thanks for stopping by,

Saturday, May 7, 2011

Mother's Day Nugget Tin

***(This the second post for today, scroll down to see the tutorial post for the Pretty Parchment Paper Pouches)***


Here is a quick nugget tin that I made for my Mom. I used the My Favorite Things Dienamics Roses Set. It was the first time I used it, and they are really quite easy to make. I didn't waste any paper making these! The leaves were punched out twice using a Martha Stewart punch and I sandwiched a pop up dots in between to give them a little more dimension. The glitter chipboard letters were adhered onto a Martha Stewart tag.

The nuggets were covered with the matching paper from the belly band. The paper is from Lily Bee Designs as part of the May VIP package from My Favorite Things. I added a few pearl embellished Martha Stewart paper punched butterflies to the
nuggets.


Supplies:
Paper: Lily Bee Designs-Picket Fence
Misc: Rose Dienamics, paper punches, tags, pop up dots, pearls, nuggets, hinged tin, glitter chipboard letter


Thanks for stopping by,

Tutorial for Pretty Parchment Paper Pockets

Here a few pictures of how I made the parchment paper pockets I made in this post. Unfortunately, the pictures I took didn't come out very well, so I substituted the parchment paper for a paper sack. They came out much clearer and came out just as well.

Cut the parchment paper 3 1/2 inches by 22 inches. Fold it in half.


Fold the bottom up about 3 inches to make pocket.


Sew along the long edges. This will complete the paper pocket. It will have the small pocket in the front and the large one in the back. Easy peasy mac and cheesy!

Now, if you like the paper bag version. I just used a small paper bag. I cut the bag in half, you will be able to make two pouches out of one bag.


Then down the side seam of the bag to make your strip.


Thanks for stopping by,

Friday, May 6, 2011

Pretty Parchment Paper Pouch Pockets


I wanted to make something for the ladies in my Mom's knitting group for Mother's Day. Mom meets with these ladies once a week, but from what it sounds like, they spend more time laughing than knitting!

I love the little glassine bags that you can buy at Papertrey Ink. For this project, I wanted a narrow bag that would hold a regular sized candy bar. What I had in mind was the type of bag that grinders came in at the Wrentham House of Pizza. For those of you that are not from Massachusetts, grinders are submarine sandwiches. The bags they used to come in where long, narrow, and made of kraft paper. I tried to find some online, but they only had plastic ones and they weren't the right size.

So, I decided to make my own. I knew I wanted a glassine style bag that was long and narrow. It came to me while I was in the shower getting ready for work. I decided to make my bag using parchment paper. It's cheap and I already had some in my cupboard. I get a lot of ideas from Michelle Wooderson's blog, Mish Mash, so I thought what would Michelle do?

These were pretty simple to make. I just cut a piece of parchment paper 3 1/2 inches by 22 inches. Fold the strip in half so it measures 11 inches by 3 1/2 inches. Then bring the bottom up about 3 inches to make the bottom pocket. Sew on both of the long sides. I will post a tutorial with pictures tomorrow to better illustrate the assembly. I didn't have enough time before I went to work today to take the pictures and of course, now, it's too dark.

I slipped the Hershey bar into the top. The embellishment for the front of the small pocket was made using the Doily Nestabilities set that my sister bought me (for no reason, just because she loves me, she said!) at Violette's. The little bird is one of my newest Quickutz and button flower is from my stash. I made a little tag with the tag Nestabilities, ric rak paper punch, and the stamped sentiment from Dandelion Designs. I finished the little tag with a small clothespin that had the matching designer paper Modged Podged on and another button flower.

The embellishment:


The tag:


I'm quite pleased with the way they came out. I hope the ladies like them as well. These little pouches are quite versatile and could be used for any variety of occasions.


Supplies:
Stamps: Dandelion Designs-Sentiment
Ink: Versafine
Paper: My Mind's Eye, Bo Bunny
Misc: Parchment paper, quickutz bird, paper punches, ribbon, buttons, small clothespin, modge podge, nestabilities, pop up dots, candy bars, sewing machine


Thanks for stopping by,

Wednesday, May 4, 2011

Spring Feet!

****(The Spring Feet Kit in my Etsy shop is now sold)****


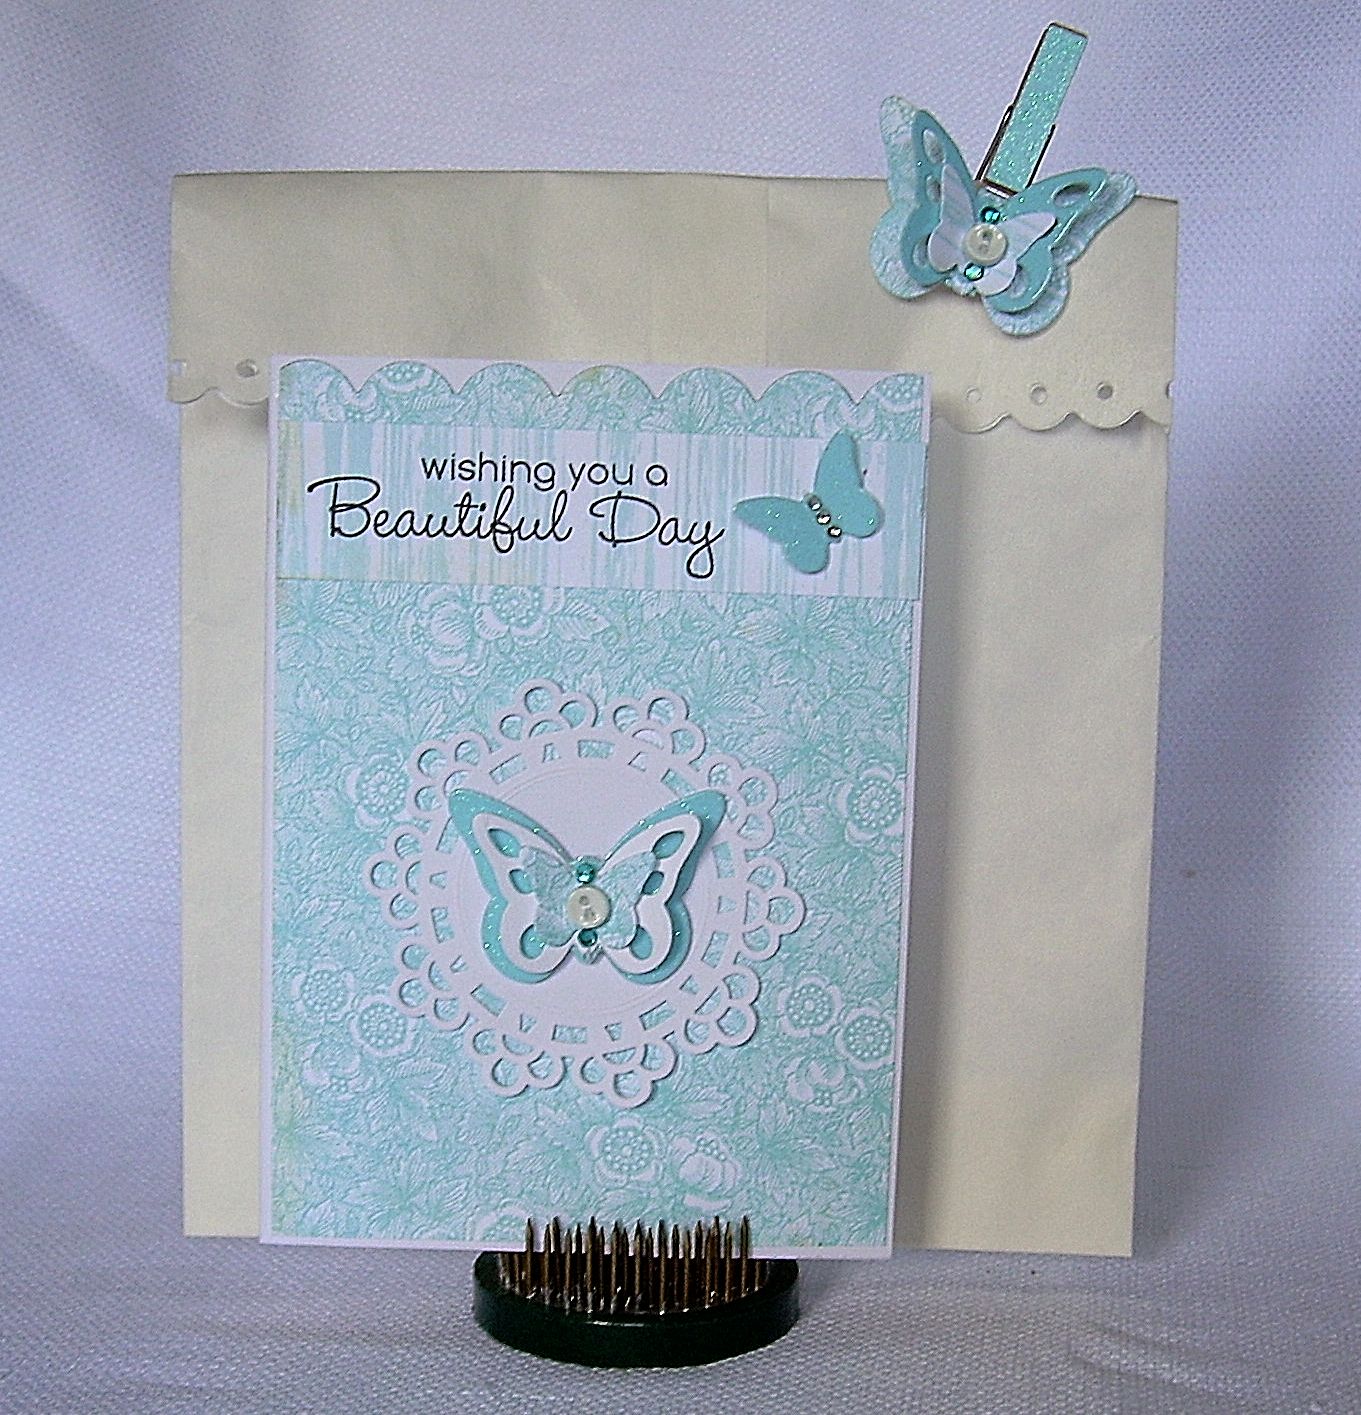
Bermember when I posted the Valentine's Day Gift, 
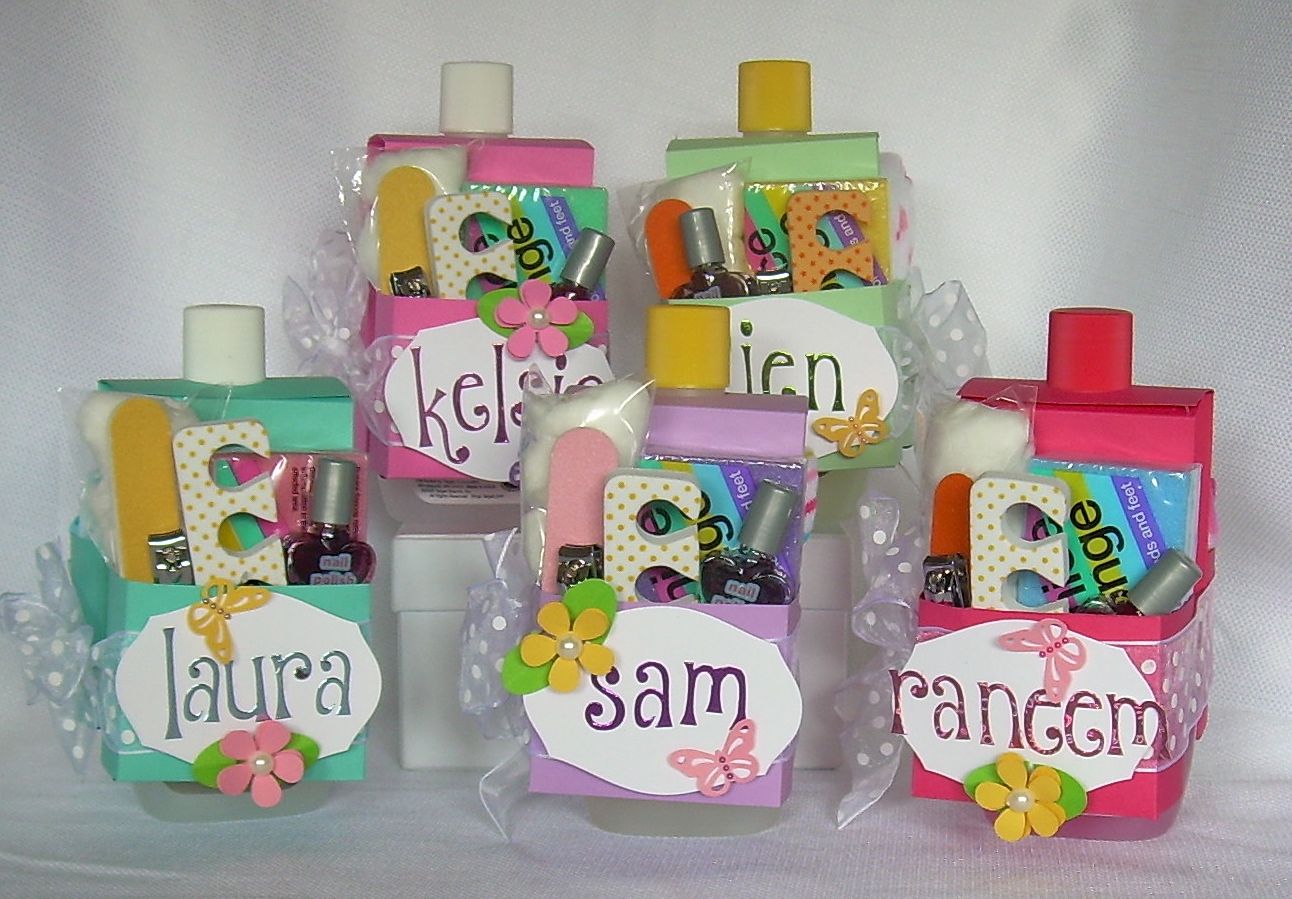
Be Sweet To Your Feet? My niece, Jenny, when she was little would say "bermember" instead of "remember. Her Mom, Laura and I still say it because we think it's funny. Well, in my quest to make some room in my crafty area by using my supplies up, I decided to make some "springy" pedi kits for Jenny, a few of her friends, and one of my other nieces, Sam.

I was inspired by this posting on Splitcoast by Virgo5. She was kind of enough to provide a FREE template to make the hanging box, which is located here. The only thing I did different was to make two hanging boxes to put on either side of the nail polish remover.

Extreme close up:


I wanted to personalize the boxes. So, using a Cuttlebug Alphabet, I cut the girls' names out of this cool iridescent paper. The tag was cut out using the Papertrey Ink Matstack Layer #1. Then, I punched out some paper flowers and butterflies and attached them to the boxes. The boxes were filled with brightly colored socks and other pedi necessities.

Side view:


The other side view:


Supplies:
Paper: Recollections, Colorbok
Misc: Pedi accessories, ribbon, sticky strip, cuttlebug groovy times alphabet, papertrey ink matstack #1, paper punches, pearls, pop up dots


Now, for some crazy reason, when I first decided I wanted to make these, I bought a bazzillion nail kits and little bottles of nail polish. Well, I still haven't used them all up (insert shocked face here!), so I have decided to list them in my Etsy shop. I bought them at Target in the Dollar Spot. There are 15 nail kits and 19 packages of nail polish. The nail kit includes a pair of clippers, an emery board, and a toe separator. Each package of nail polish contains two bottles. This whole loot fits in a medium flat rate USPS shipping box. I'm selling the entire box for the bargain price of $10.00 plus the cost of shipping! This is an easy project that would be perfect for girls to make at slumber parties, summer camp, etc. I will be posting box of supplies, after I post this, on Etsy. So, if you are interested, go check my shop out.


Thanks for stopping by,

Tuesday, May 3, 2011

Thank You Mom...Mother's Day Card


Here is another card that I made for my Mom for Mother's Day. This is was first My Favorite Things VIP Kit that I bought. It's from the Girls Rule release that goes live TONIGHT!! So, make sure you check out their release party, all the details can be found HERE.

I double stamped the body and popped it up using pop up dots. The dress is paper pieced using Papertrey Ink paper. I paper punched some little flowers, added a rhinestone center, and gave them ric rack stems. Using the My Favorite Things Framed Greetings set with matching die, I cut stamped and cut the frame for the sentiment label. The sentiment is from the VIP package. A few rhinestones here and there, a little bit of ribbon and some more pop up dots completed my card.

It's kind of a fat card, so I made a bag/envelope to hold the card. The tag was made using Nestabilities, some glitter chipboard letters, and this great glitter clothespin that I got on clearance at Michaels. I wrapped ribbon around the bag and tied a bow. The daisy on the bow was made by punching two flowers out and sandwiching a pop up dot in the middle to give it a little more height. The button center was made using the Papertrey Ink button die set. The clothespin attaches the tag to the ribbon.


Supplies:
Stamps: My Favorite Things-Girls Rule VIP kit, Framed Greetings
Ink: Versafine, Memento
Paper: DCWV, Imaginesce, Bazzill, Papertrey Ink
Misc: Ribbon, rhinestones, ric rack, paper punches, pop up dots, chipboard letters, glitter clothespin, dmc floss, nestabilities, copics, framed greetings die, button die


Thanks for stopping by,

Monday, May 2, 2011

Bitty Bags

You may remember the Bitty Bag that I gave away as a part of the blog candy from my first blogoversary. I made a bunch to sell in my Etsy store.

The Bitty Bags are a great way to package/present gifts to a special someone. They can be used for any occasion and they are reusable, so they are good for the environment. The bags (including the handles) are approximately 12 inches by 7 1/2 inches. The actual bag is 6 inches by 7 1/2 inches. They are quite spacious and can hold a variety of items. Each bag comes with a handmade coordinating tag.

Here are a few examples of the Bitty Bags in action....

With the end of the school year approaching, don't forget to give someone thing to your favorite teacher:


My bag contains a notepad, an entire bag of Hershey Nuggets, a variety of pens/pencils, and set of six teacher themed cards and envelopes that I stamped.

Here is a close up of the tag:


I love birthdays, especially mine! I love presents and cake. I'll never understand why some people don't want to celebrate their birthdays, be happy, it's your special day!

Here is a birthday Bitty Bag. For this special birthday person, I've included a 12 pack of Copic Markers, a set of stamps from Papertrey Ink, some paper, and a package of butterfly embellishments.


Here is a close up of the tag:


Do you know someone that needs a little pick me up? They say laughter is the best medicine, so why not put a smile on some one's face with this Bitty Bag. I've included one of Will Ferrel's funny movies, "Semi Pro", some microwave popcorn, and a big bag of M & M's.


Here is a close up of the tag:


So, those are a just a few examples of the many uses of the Bitty Bags. The bags with the matching tags are only $5.00! Sorry, contents of the bags are not included! They are just to show you how much you can fit in these great little bags. Make sure you check out my Etsy shop to see more bags.

Supplies:
Stamps: Papertrey Ink, Dandelion Designs
Ink: Versafine
Paper: Bazzill, Recollections, Making Memories
Misc: Cricut, nestabilities, pop up dots, paper punches, fillable frames #5, rhinestones, diamond glaze, ribbon, fabric, buttons

Thanks for stopping by,