I have finally opened my very own Etsy Shop! I am very excited. To celebrate the grand opening, I am offering some great specials. So far, I have only two "Boxes of Fun" listed. One is full of teacher appreciation gifts and one is full of Halloween supplies. I will be posting more, but I have to go to work now, boo hoo! My plan is to offer affordablely priced handmade goods for all aspects of gift giving. Eventually, I would like to also list some kits and supplies. Please bear with me, I have only sold on e-Bay, so this is a new adventure for me. You will find my link to my Bethapalooza shop on the right, if you are interested.
Thanks for stopping by,
Beth

Monday, September 27, 2010
Friendship Cards

I was inspired by Michelle Wooderson's sketches she did in the Papertrey Ink newsletter last week. Her blog is definitely one of my favorites, I get a lot of ideas from her. Each of these card sets contain four cards and envelopes. I used the Daisy Quickutz double die to cut the flowers. They are packaged in a clear acetate bag and fastened with a matching clothespin.

Supplies:
Stamps: Papertrey Ink-Green Thumb
Ink: Versafine
Paper: DCWV, Bo Bunny, Bazzill
Misc: Buttons, quickutz daisy, ribbon, paper punch, pop up dots, clothespin, clear acetate bag, dmc floss
Thanks for stopping by,
Beth
Thursday, September 23, 2010
Paper Punch Addiction Blog Candy Contest
Even though I decided that I wasn't going to do anymore contests for awhile, I couldn't resist my new friend, Kim's, contest at Paper Punch Addiction. I've been feeling sorry for myself because I lost the last contests at Card Of The Week. I would like to thank everyone who continued to vote for me, even after the contest ended. So, when you look at the votes now, "I Won!".
So, while I had grandiose plans for this contest and the creation that I was going to make would make the most well respected "Goddesses" of the scrapbook world faint and utter in their last breath before losing consciousness, "This is absolute perfection, we can all stop now, nothing can top this!".
But, instead this is what I came up with. I tried to make a vampire with real vampire costume teeth. It looks more like Eddie Munster's mother cut his bangs too short (not like that ever happened to me!), and then his friends made fun of him and punched him in the mouth! It kind of reminds me of when my sister and I ran track in high school. We were always last, we said it was so that the other girls wouldn't feel bad for being slow! So, here is my project, so at least the other participants won't feel bad, mine is definitely the worse! Try not to laugh to loud, you don't want to scare your family and/or pets.

Supplies:
Paper: Bazzill, DCWV
Misc: Nestabilities, punches, pop up dots, black stickles, plastic vampire teeth, sticky strip
Thanks for stopping by,
Beth
Happy Harvest Card Set

Vintage Picnic is one of my favorite Papertrey Ink sets. While fall is officially here, it's still a thousand degrees here in Florida! One of the things I miss since I moved here from New England, is the fall. Not the cold and snow! I'm hoping that this fall inspired card set will bring on some cooler temperatures. The set includes six card with envelopes. I packaged it in a clear plastic bag and added a matching clothespin to hold it shut. It would make a really nice housewarming or a "just because" gift for a friend.

Supplies:
Stamps: Papertrey Ink-Vinatage Picnic
Ink: Versafine, Memento
Paper: Recollections, Debbie Mumm, Bazzill
Misc: Ribbon, copics, nestabilities, clothespin, button, dmc floss, black sharpie pen, leaf paper punch, pop up dots, half beads
Thanks for stopping by,
Beth
Tuesday, September 21, 2010
Witch Hats

Here is another quick and easy Halloween project for your favorite trick or treaters. Just fill some frosting bags with M & M's for the cone of the hat. I used my coluzzle to cut an oval for the at brim. From there, I just added a tag and made a hat band.
Supplies:
Stamps-Studio G
Ink: Versafine
Paper: Bazzill, Debbie Mumm
Misc: Coluzzle, frosting bag, sticky strip, M & M's, paper punches, orange sharpie pen, pop up dots
Thanks for stopping by,
Beth
Friday, September 17, 2010
Pumpkin Cupcakes


I bought this great book awhile ago, Paper Sculpt Sensation by Marion Elliot. She made these really cute cupcakes out of paper, so I decided to give them a try. Since I'm on a pumpkin paper punch kick right now, I thought I would make some halloween cupcakes. Every cupcake needs a box, so I made the box and embellished it with one of my button spiders. If you are interested in this book, I bought it at Michaels. It's definitely worth the investment.


Supplies:
Paper: Bazzill, Debbie Mumm
Misc: Sticky strip, stickles, pop up dots, clear acetate, button spiders, ribbon, coluzzle, nestabilities, crop-a-dile, crimper, candy, paper shred
Thanks for stopping by,
Beth
Thursday, September 16, 2010
Trick or Treat Goody Bags

Here are some easy trick or treat goody bags that I made for my friends for Halloween. They are based on a one of my first paper craft projects I ever did! I'm afraid to show you the original! This is the new and improved version, I used a bigger bag and added a clothespin with the recipients name on it.

Supplies:
Stamps: Jo Ann Fabrics-Alphabet
Ink: Versafine, Versacolor
Paper: Bazzill, Bo Bunny
Misc: Crop-a-dile, paper punches, ribbon, pop up dots, paper bag, clothespin, modge podge, buttons, crimper
Make sure you go check out my cousin's blog, Melissa's Projects. She has the cutest ideas and some great baked goodies.
Thanks for stopping by,
Beth
Wednesday, September 15, 2010
Candy Tote

While I was surfing the paper craft blogosphere, I found this great tote tutorial on Mushi's blog. She has the cutest stuff. I decided to use the Great Impressions September stamps to make a unique halloween trick or treat candy tote.

The tutorial is available here on Mushi's blog. I used the Martha Stewart Drippy Goo punch and some rhinestones to embellish the witch's cauldron. It's hard to see, but I used glitter on their hair to make it look a little wiry.
Supplies:
Stamps: Great Impressions-Witches, Inky Antics-Sentiment
Paper: Bo Bunny, Recollections
Ink: Memento, Versafine
Misc: Crop-a-dile, paper punches, ribbon, clear acetate, rhinestones, copics, glitter
Thanks for stopping by,
Beth
Monday, September 13, 2010
Teachers Rock Card
(Edit**You can vote for my card at Card of the Week here.)

I found a this great digital stamp store called Kenny K Downloads. It is awesome! They have a ton of rocker images, which I love. I originally designed this card for the Card of the Week contest. I hope I can still enter it, I'm running late, again!
Here's a shout out to my cousin's wife, Becky, assistant principals rock, too!
Supplies:
Stamps: Kenny K-Rock Chick
Paper: DCWV, Recollections
Misc: Ribbon, brads, rhinestones, nestabilities, copics, alphabet beads, pop up dots
Thanks for stopping by,
Beth
Saturday, September 11, 2010
Scarecrow Tutorial

Here is the tutorial for the Scarecrow that I did for the Paper Punch Addiction Blog Hop. I actually only used three punches, and they are all for his head.

The head is the vase punch or as Laura calls it, the uterus punch. The nose is a triangle and the eyes are the tear drop punch.
To make his outfit, cut out the following:
All measurements are in inches.
Shirt Sleeves: Cut 2 strips 1/2 x 2
Shirt Bodice: Cut 1 rectangle 1 1/2 x 1 3/4
Overall Straps: Cut 2 strips 1 x 1/2
Overall Bib: Cut 1 rectangle 1 1/4 x 1 1/2
Pant Legs: Cut 1 rectangle 2 x 1 1/2
Pocket: I just cut a small square free hand.
Hat: Cut 1 rectangle 3 x 2 1/2
 Cut the corners off shirt bodice, overalls bib, and cut a slit to make the pant legs. I just did this free hand. To assemble the scarecrow:
1) Glue the sleeves to the shirt bodice. Glue the straps onto the shirt. Glue the bib on so that it hangs over the shirt (when you turn it over) about a 1/4 inch. Then, glue the pants on where the bib overlaps the shirt . Don't worry about the line showing, you can cover it up with a little raffia belt. Use a white gel pen to add stitching lines.
2) Make 6 little raffia bundles. Don't worry about the size, just make them a little bigger because you can give him a hair cut after they attached. Glue 2 on for feet and 2 for hands. You can glue little buttons or bows to his cuffs.
3) The hat is just the basic paper sailor hat we used to make as kids from newspaper.
4) For the face, I cut the stem off the uterus punch. Glue the eyes (tear drops) and nose (triangle). The mouth is drawn in with a sharpie pen. White gel pen was used to highlight his eyes and a little pink ink gave him some rosy cheeks. Glue his hair and hat on, then attach it to his body.
You are now done with the scarecrow, just add him to anything to give new life to any fall project! Thank you for all of your kind words and patience while I finished the tutorial. If you have any questions, please feel free to let me know. If you decide to make this little guy, I would love to see a picture of it.
Thanks for stopping by,
Beth
Friday, September 10, 2010
Mr. Scary Doughnut Man

My sister and I were at Walmart the other day, I needed some doughnuts. She picked up the box with the little white ones and said, "Wouldn't this be cute if you made this into a skeleton with the doughnuts as his ribs?". I was like of course, I can cut it with my Cricut. Well, easier said than done. I don't have any of the Cricut software cutting programs, so I just had to wing it.
I used the Paper Doll Dress Up Cartridge to cut out the skeleton. I gave him a thoracotomy and removed his ribs. I didn't have a the layering option on the skeleton, so I just traced the skeleton and cut him out free hand. The two layers are attached with pop up dots. The hardest part was the face, I did it like 10 times, and I'm still not completely satisfied. I was trying to channel Donna at Popsicle Toes to see what she would do, but I couldn't come up with any good ideas. I am going to keep trying.
Supplies:
Paper: Recollections
Misc: Cricut, Paper Dolls Dress Up Cart, rhinestones, pop up dots, black sharpie pen, ribbon, donuts, sticky strip
I am almost done with the Scarecrow tutorial. I just have a few finishing touches to put on it.
Thanks for stopping by,
Beth
Thursday, September 9, 2010
Blog Hop Tutorial and Happy Birthday, Dad!
I would like to thank everyone for the all of the comments and compliments on my scarecrow that I made for the Paper Punch Addiction Blog Hop yesterday. I am working on the tutorial, I was up until 2:00 AM working on the scarecrow, so I need to go back and figure out how I made it! As soon as it's done, I will post it. Thank you for your patience. (PS-Mom, I only made one of these bags, so, yes, you can have it!)
Today is my Dad's birthday. Happy Birthday! I'm not going to post his card until he receives it, just in case he sees it here before he gets it in the mail. Sometimes his mail is a little slow.
Today is my Dad's birthday. Happy Birthday! I'm not going to post his card until he receives it, just in case he sees it here before he gets it in the mail. Sometimes his mail is a little slow.
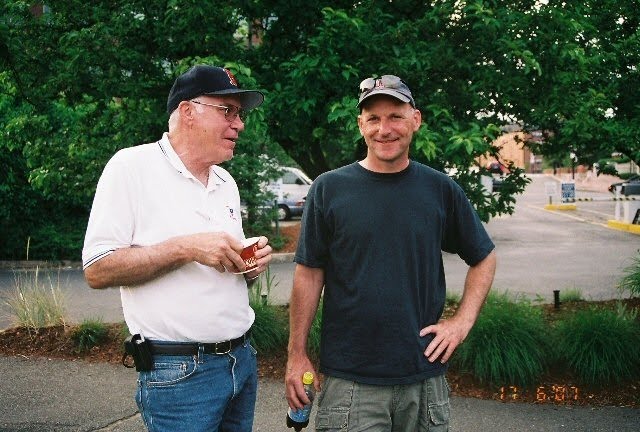 My Dad and my brother, Richard.
Thanks for stopping by,
Beth
Wednesday, September 8, 2010
Paper Punch Addiction Blog Hop

This my first ever blog hop. I'm not really sure what I'm doing, so please bear with me! Of course, I waited until the very last minute to make my project. I studied all of the paper punch art at Splitcoast and that is how I decided to make something fall themed. I'm really into lunch sacks right now, so I made this goody bag. The scarecrow and pumpkins are made from various punches. The fence is a yellow Sizzix die. I finished it off with a tea dyed clothespin. I hope you like it. My table is a mess with little bits of raffia EVERYWHERE!
Go on and check out what the extremely talented ladies participating have dreamed up. (Edit-I think I fixed it!) I know that I didn't do this right, I couldn't figure out how to paste the link list, so I did it the hard way. If you can't connect to the other blogs, go to Paper Punch Addiction, she has the list of all the participants. Sorry to make this so difficult, I really don't know what I'm doing!!
Paper Punch Addiction
Blinkin' Thinkin' & Inkin'
It’s A Stamp Thing
Kelli’s Korner
Northwest Stamper
Ink Paper Stamps
Gwen’s Paper Expressions
Stamping My Life Away
Gettin’ Crafty
Krafty Kate’s Kupboard
Brenda’s Stamping Corner
Beth-a-Palooza
Bonnie’s Creative Place
Craft Chaos
Supplies:
Paper: Cosmo Cricket, The Paper Company, Bo Bunny, Recollections
Misc: Raffia, lunch sack, clothespin, buttons, ribbon, paper punches, pop up dots, sizzix, fence die, white gel pen, black sharpie
Thanks for stopping by,
Beth
Tuesday, September 7, 2010
Witch's Brew

Nichole Heady had this great tea bag holder card and matching envelope on her blog. You can see her post here. I decided to incorporate it with this great stamp from Great Impressions.


I colored the cauldron in solid, then added diamond glaze. Using my Martha Steward Dripping Goo punch, I cut out drippy goo from glitter card stock. Rhinestones were added to give the appearance of bubbles.
Not everyone likes hot tea, so I used the same stamped image to make a water bottle/drink mix cozy.


Supplies:
Stamps: Great Impressions-Instant Witch
Ink: Memento
Paper: Bazzill, DCWV, Recollections, Debbie Mumm
Misc: Copics, rhinestones, ribbon, drink mix, nestabilities, tea bags, water bottle, witch hat quickutz, pop up dots, brads, sticky strip, diamond glaze
I've finally figured out how to set up my feedburner on my blog so you can subscribe for e-mail updates. The link is on the top right hand corner. Many thanks to all of my loyal followers!
Thanks for stopping by,
Beth
Monday, September 6, 2010
Happy Harvest

Here is another idea for the little metal pails. I used the Stampin up Loads of Love and Loads of Love Accessories sets to make a quick tag. The truck is paper pieced and diamond glaze was applied to the tires. I filled the pail with mini pine cones and pumpkin scented potpourri. A battery operated tea light was placed in the votive cup. I cut the tag with the Nestabilities Labels One. This would make a "scent-sational" gift!
Supplies:
Stamps: Stampin Up-Loads of Love and Load of Love Accessories
Ink: Memento, Versafine
Paper: Cosmo Cricket, The Paper Company
Misc: Nestabilities, copics, ribbon diamond glaze, pop up dots, metal pail, battery operated tea light, votive cup, potpourri, mini pine cones
Thanks for stopping by,
Beth
Friday, September 3, 2010
For My Teacher Lunch Sack

I saw this adorable tag on Splitcoast the other day, and I knew I had to case it. Instead of the using the label die, I cut a tag card with the Tags, Bags, Boxes & More Cricut Cartridge. Designer paper, cardstock, and ribbon were attached to an ordinary brown paper lunch sack. I've also been inspired by Michelle Wooderson's clothespins, so I decided to incorporate a clothespin. I tea dyed the clothespin to give it a little bit of an aged look, then attached the paper and a button.

Supplies:
Stamps: Papertrey Ink-Vintage Picnic
Paper: Recollections, Bazzill, Bo Bunny
Ink: Memento, Versafine
Misc: Nestabilities, copics, brads, buttons, ribbon, cricut, tags, bags, boxes & more cartridge, clothespin, tea bags, modge podge, paper lunch sack, pop up dots, dmc floss
Thanks for stopping by,
Beth
Thursday, September 2, 2010
Turkey Tins Tutorial

Now, say that that three times fast! Thank you, again, for the all of the sweet comments on my turkeys. Here are the directions.
-Create the belly band the same way the as the on the spiders and pumpkins.
-The body is cut using 2 1/2 inch and 2 inch circle punch or nestabilitie.
-Using a 5/8 circle punch, cut 2 white circles and 1 brown circle. Cut the brown circle in half to use as the eyelids. I used the crop-a-dile to cut the black centers of the eyes. Attach the eyes to the 2 inch circle using pop up dots.
-The beak and waddle are cut free hand, glued together and attached with a pop up dot on the face.
-The feathers are cut using the leaf on the Doodlecharms Cartridge. The are cut black out at 2 1/4 inches. I used a black pen to accent the details. Using snail, I attached the leaves (overlapping) in a semi circle around the 2 1/2 circle.
-Attach the head to the body with pop up dots.
-Using sticky strip, attach the back of the turkey to the belly band.
-Apply brown stickles to the eyelids and yellow stickles to the beak.
-While your stickles are drying, you can make your name tag. I just stamped our names, cut them out with an oval punch, and attached them to little wooden skewers. Attach a little bow to cover up the skewer. I used a little piece of sticky strip to attach it to the back of the turkey.

If you have any questions, please let me know. If you make any of these, I would love to see a picture.
Thanks for stopping by,
Beth
PS I've entered one of my cards in a birthday card contest at Card of the Week. If you would like to vote for me or check out the other cards, click here.
Subscribe to:
Posts (Atom)